Working with tables
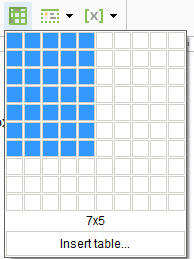
You can insert tables of any complexity in Dr.Explain. Click  button in the editor toolbar to insert a table into editor.
Move mouse pointer to select table dimensions and then click on an empty cell. Alternatively, click Insert table... at the bottom of the pop-up to insert a table of a custom size and configure its appearance.
You can also use the keyboard shortcut Ctrl+Shift+T. The following dialog window will appear:
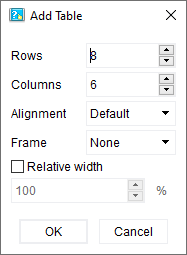
To insert a table, follow these steps:
-
specify the required number of rows and columns in the corresponding counter fields;
-
select the desired alignment type for the table: Default (the table will take the entire paragraph), Left (text will wrap on the right side) or Right (text will wrap on the left);
-
specify border type (without a border or solid);
-
set relative width (if needed);
-
click OK to insert the table.
To change the table width or height, drag the table border.
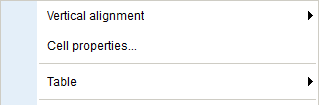
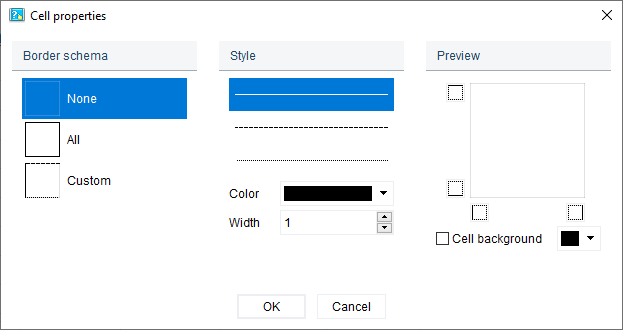
To change cell's border or background, right-click inside a cell and select the Cell properties... option from the context menu. If you want to change properties of multiple cells, select them and and right-click on selection:

Add captionSelect this menu item to insert table caption.
|