Capturing screenshots
You can either add a new topic with an annotated screenshot object or insert the annotated screenshot into an existing topic.
-
To add a new topic with an annotated screenshot, click
 button in the main toolbar or use Ctrl+W keyboard shortcut.
 -
To insert an annotated screenshot into an existing topic, click
 button in the editor toolbar and select Capture and annotate... in the drop-down menu or use Ctrl+Shift+W keyboard shortcut.
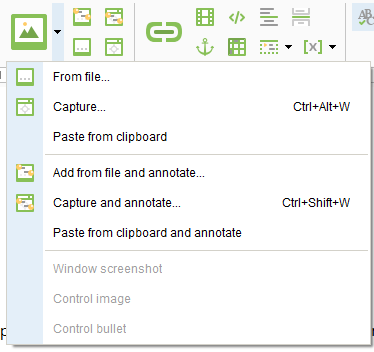
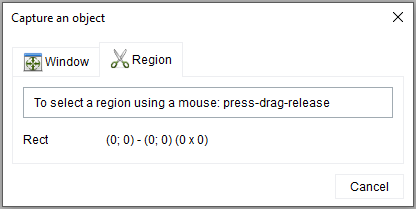
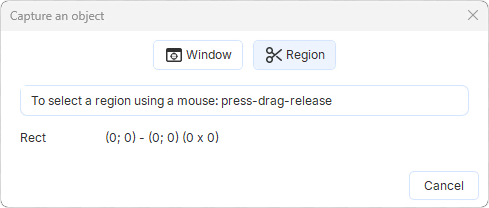
Once you start capturing a new window, the following Capture an object dialog appears:

You can capture screenshots in two modes: Window and Region. By default, the last used mode is active. The capture area is highlighted with a colored outline:
Capture an entire window
Use Window mode to capture an entire window or sub-window. Automatic annotation is only available when capturing screenshots in this mode.
The captured area is highlighted with an outline, so you can clearly see what part of the screen you are capturing.
You can adjust the color of the highlight on the Screen capturing settings page.
|
The Capture an object dialog is displayed on top of all other windows by default, so that you can configure the required capturing settings on-the-fly. If necessary, you can move the Capture an object dialog out of the way.
To perform a capture press Print Screen key on your keyboard; or hold Ctrl and click left mouse button, or press left and right mouse buttons simultaneously.
Capture screen region
Use Region mode to capture a rectangular portion of the screen.
Select the region you want to capture by clicking, dragging, and releasing the mouse.
Press Esc while dragging to cancel the selection and to select a new region.
Once you release the mouse button, the capturing will start.