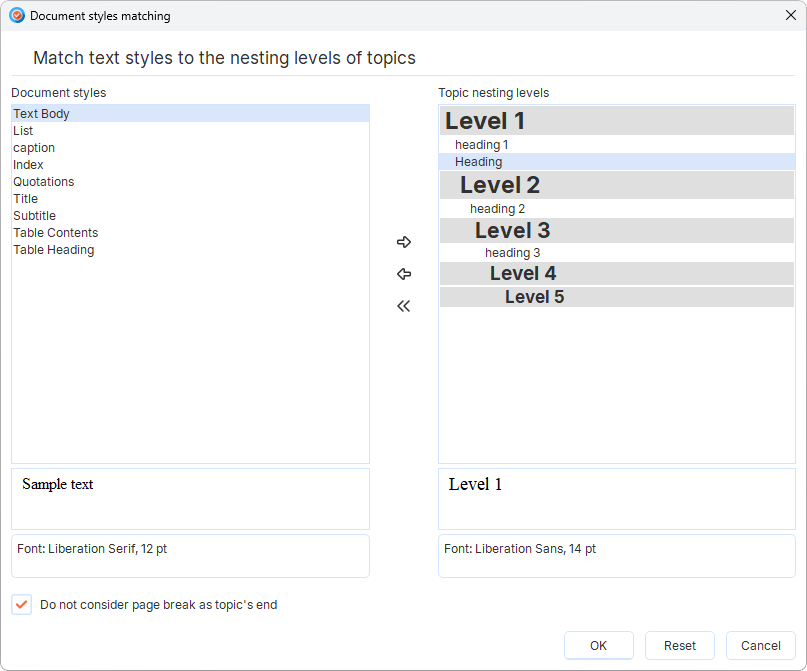
This dialog appears when importing RTF or Microsoft Word file. You can match document formatting styles andtopicnesting levels by dragging and dropping the desired style into the appropriate section on the right side of the Document styles matching dialog box.
Document styles list
This list displays all document styles found in the imported RTF document.
This list shows all available topic nesting levels.
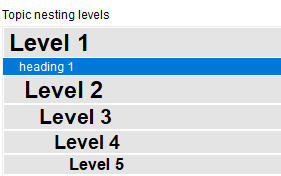
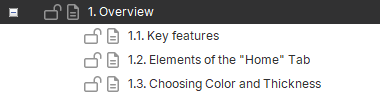
Consider the example below. Below is a screenshot of the RTF file. It contains one first-level heading (style "heading 1") and three second-level headings (style "heading 2").
During importing this file into Dr.Explain in the Document styles matching dialog select "heading 1" on the left and Level 1 on the right, then click icon in the center of the dialog. "heading 1" will move to the right side of the dialog, into Level 1 section.
This means that when Dr.Explain comes across text written in the "heading 1" style during the import process, it will create a first-level topic in which it will place the contents of the part of the document that is after the text written in this style.
Do the same with the "heading 2" style and Level 2, etc. Leave the other styles on the left side of the dialog as they are.
As a result of importing this document, the Dr.Explain project will be created with one first-level topic ("Overview"), which will have three subtopics: