Inserting images
In Dr.Explain, you can insert either a plain image or an annotated screenshot object into topic. You can images of both types from file, paste from system clipboard, or capture a screenshot of a running application.
Dr.Explain supports inserting images from files of these formats:
-
BMP;
-
JPG;
-
GIF1;
-
PNG.To insert an image into an existing topic, click
 button in the editor toolbar.The following pop-up menu will appear:
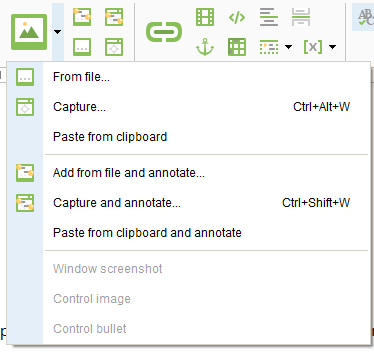 If you want to add a new topic with an annotated screenshot, use the Capture window
 button in the main toolbar. Click an arrow down icon next to this button to see other options:
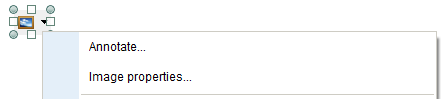
To edit the image properties, right-click it and select Image properties... from the context menu.
You can convert plain images into annotated ones. Right-click and select Annotate... from the context menu.
 |
You can resize the image either in the Image properties window or by dragging its border into the desired direction.
The images of the control and the callout icon are generated depending on the section of the control description in which they are located. If you try to copy them from one control description to another, the image of the target control will be pasted, not the images of the control you copied them from.
|
To link your image to an internal object or external URL address, select the image and then click  button in the editor toolbar.
1 When you insert an animated GIF image into Dr.Explain, it's converted into a static one. If you export only to HTML or CHM, you can insert animated GIF image using an HTML code snippet of an <img> tag with src attribute containing Base64-encoded image data (known as data URI). You can also convert an animated image into a video and insert this video instead of an image.