To properly display this page you need a browser with JavaScript support.
In this dialog window, you can configure the list styles. You can use these styles to create customized multilevel lists in the
Content editor .
To access the dialog, use one of the following methods:
go to the
Project menu and click the
Project settings menu option;
Project settings dialog should appear. On the left side of it go to Content editor List styles .
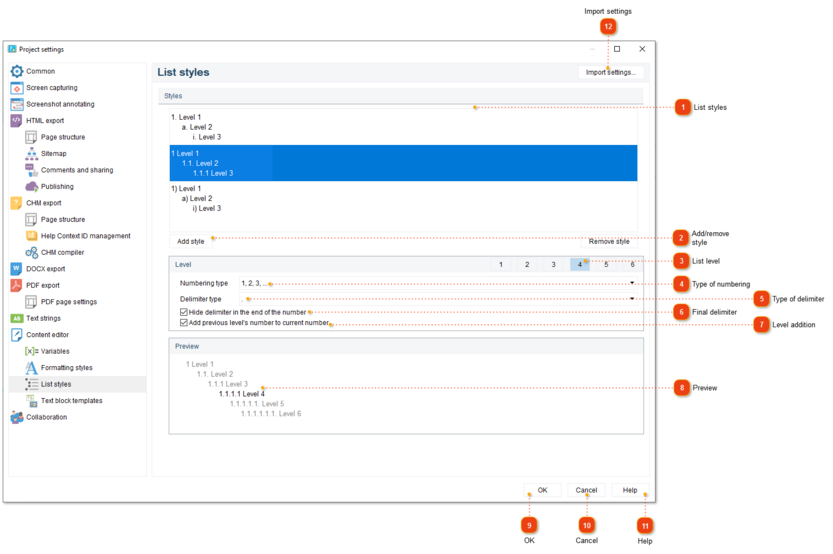
List styles
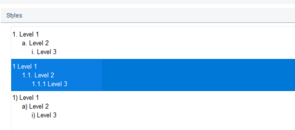
Use this list to select a style you wish to customize.
Add/remove style
These buttons allow you to add and remove styles from the list.
List level
Use the numbered buttons to select a level of list you want to customize.
Type of numbering
Use this field to specify the numbering type for a certain list level.
Type of delimiter
Use this field to specify the delimiter type for a certain list level.
Final delimiter
Check this option to enable the delimiter sign in the end of the number for current level.
If you want the dot at the very end of the number should not be shown, but the sublevel numbers should be separated by a dot:
1 first level
1.1 second level
1.1.1 third level
Level addition
Use this parameter to add previous level's number to current number.
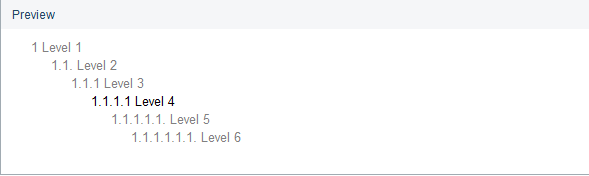
Preview
The preview area displays the numbering style of all levels simultaneously. An example of the numbering of the selected level is written in black. With a mouse click, you can select the level that the settings will apply to (similar to the
List level ).
OK
Press the button to accept all changes and close the dialog.
Cancel
Press the button to accept all changes and close the dialog.
Help
Press the button to show the context help page.
Import settings