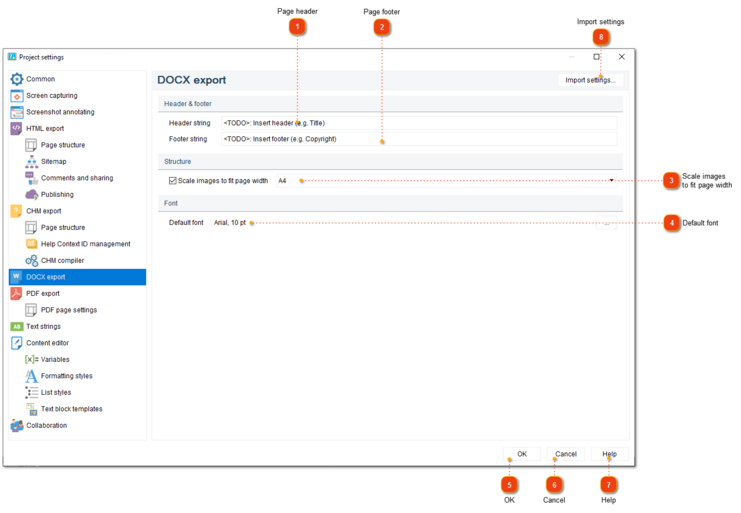
In the DOCX export section of Project settings dialog you can configure appearance of exported DOCX file.
To open the project settings, use one of the ways described below:
-
-
go to the
Project menu and click the
Project settings menu option;
-
Project settings dialog should appear. On the left side of it go to DOCX export.
 Page header
Use this field to specify the text to be used as the header of each page, e.g. title of the document.
|
|
 Page footer
Use this field to specify the text to be used as the footer of each page, e.g. copyright notices.
|
|
 Scale images to fit page width
Check this option to automatically resize images during export so that they fit the page width.
|
|
 Default font
Use this field to specify the default text font.
|
|
 OK
Press the button to accept all changes and close the dialog.
|
|
 Cancel
Press the button to close the dialog and to discard the changes.
|
|
 Help
Press the button to show the context help page.
|
|
 Import settings
Press this button to import settings from another project file.
|
|
