


This article shows you how to annotate screenshots in Microsoft Word — no design or coding skills needed. Clear visuals are crucial for any documentation, especially user manuals. We've illustrated each step of this guide with screenshots, which makes the article a bit long, but the process itself is quite quick.
However, even though annotating in Word is simple, there's a much faster and more efficient way. We'll tell you about it at the end of this article.
Let's get started!
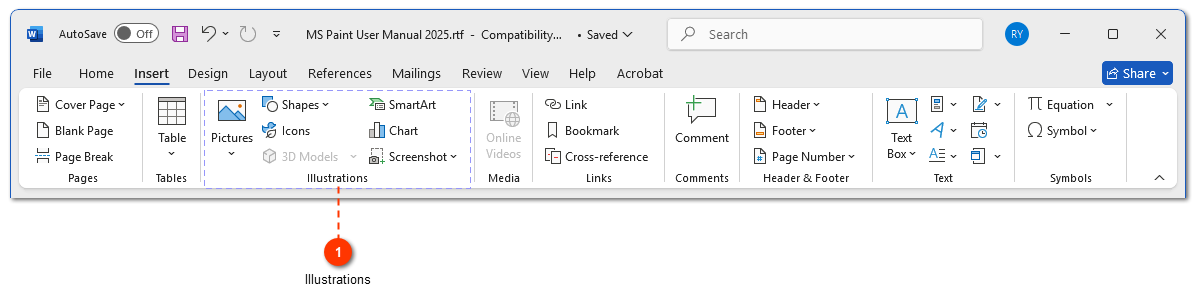
Essentially, all you need from Word's toolbox is the "Illustrations" pane, located on the "Insert" tab in the main menu.
We'll annotate a screenshot of Paint program's toolbar.

1. Make sure both the program you're capturing (Paint, in our case) and Word are open. First, open Paint, then switch to Word.
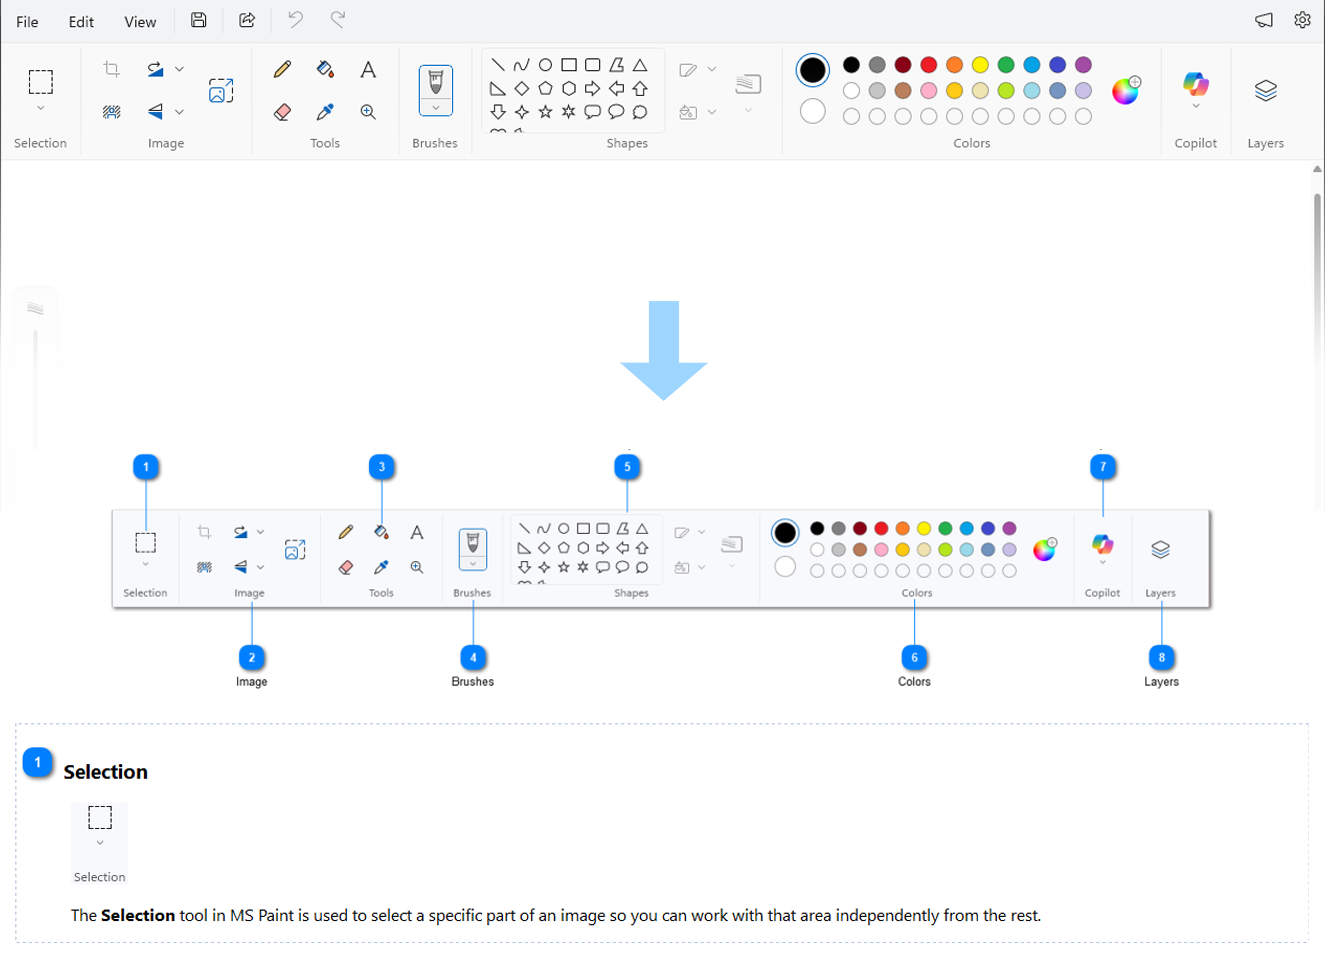
2. In Word, go to the Insert tab (1). In the "Illustrations" pane, click the Screenshot icon (2).
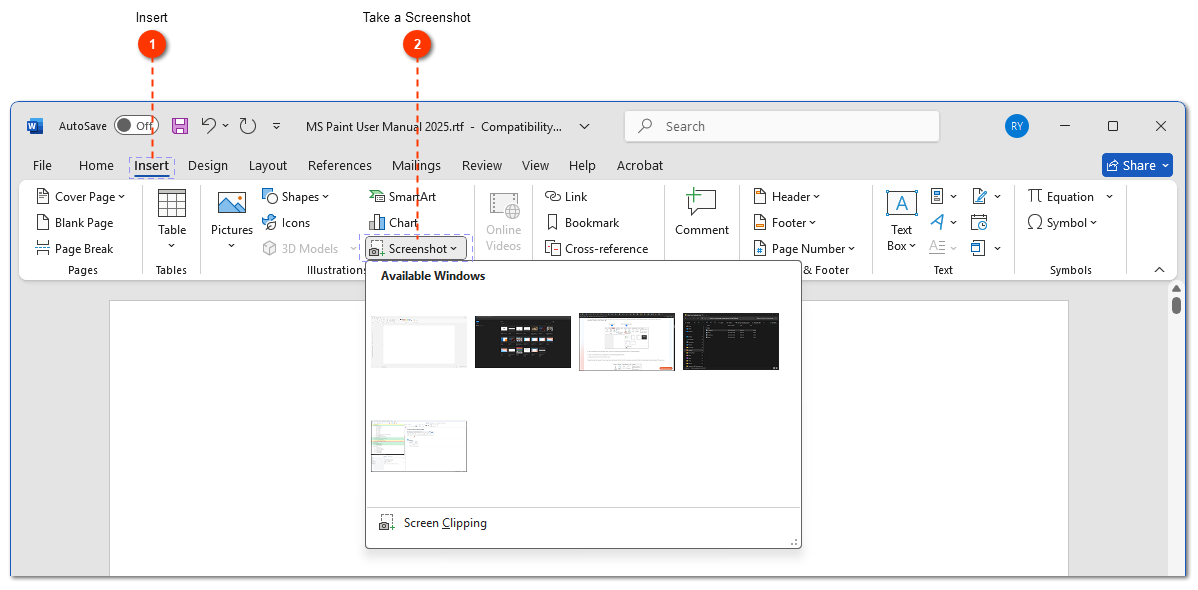
3. Word displays thumbnails of all currently open windows. You have two choices:
- Click a thumbnail to insert a screenshot of that entire window.
- Choose Screen Clipping (1) at the bottom to select a portion of a window.
We'll clip just Paint toolbar. Click Screen Clipping.

4. Paint window will open, and your arrow will turn into a crosshair. Click and drag to select the area you want (the toolbar).
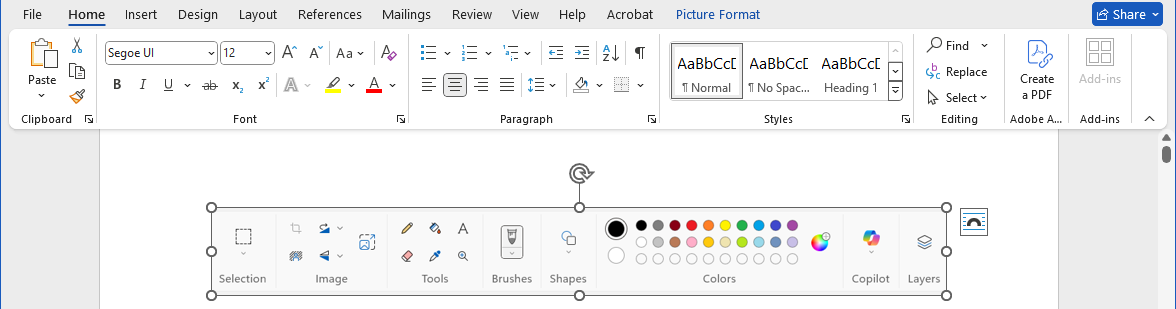
5. Word will automatically open and paste the clipped screenshot into your document.
6. Now we have our screenshot. Go back to the Insert tab, click Shapes (1), and choose a shape to highlight an element. Let's pick the "Rounded Rectangle" (2).
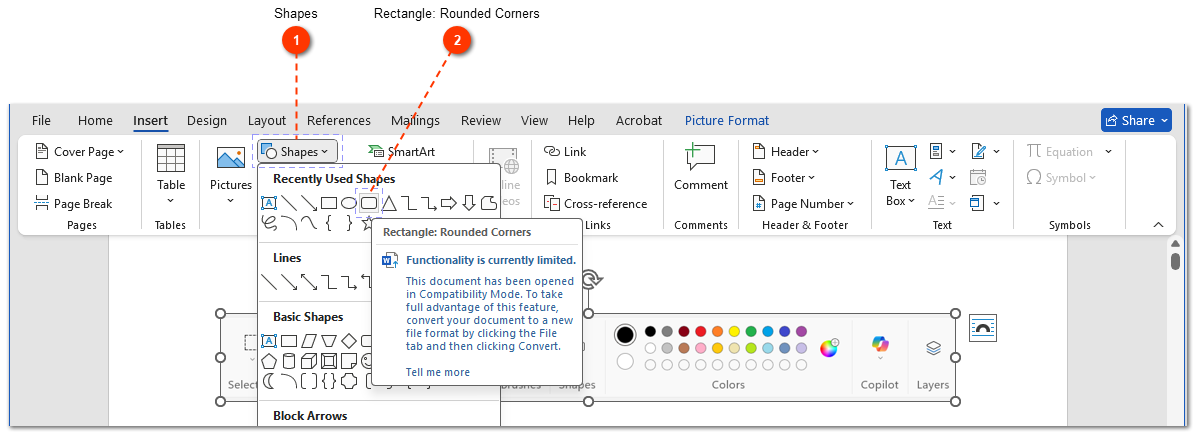
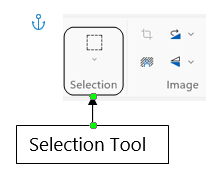
7. Your arrow turns back into a crosshair. Click and drag on the screenshot to draw the shape around the element you want to highlight. Let's outline the "Selection" tool. It will look like this initially.
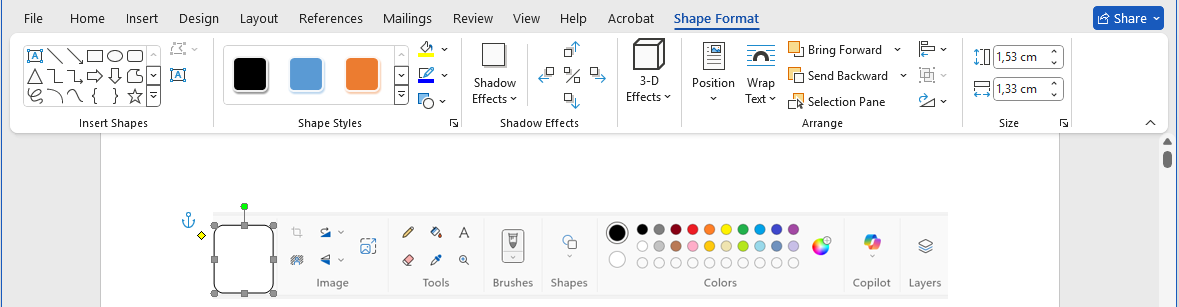
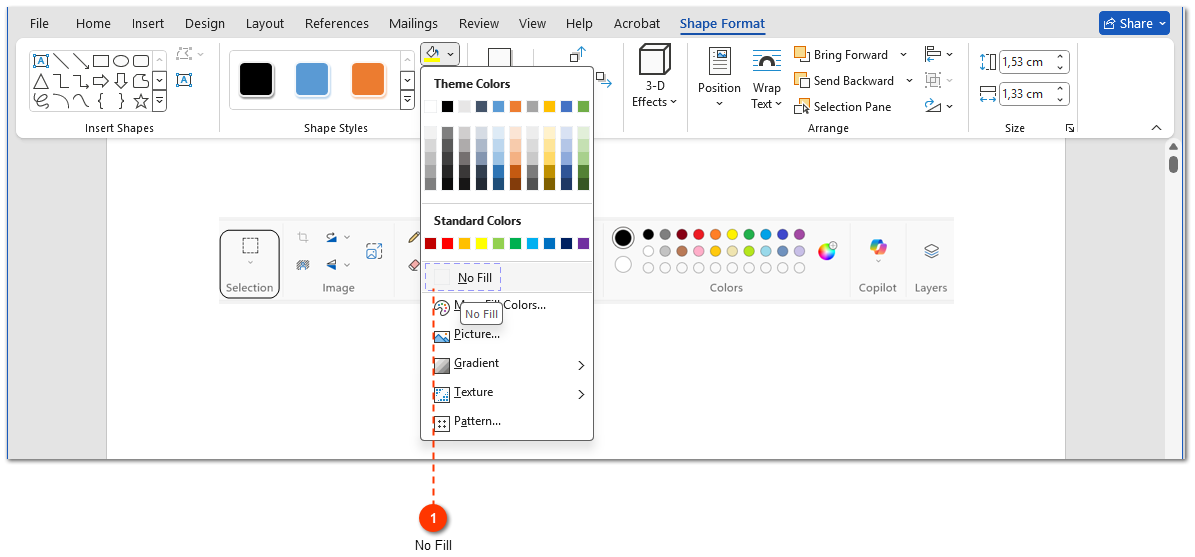
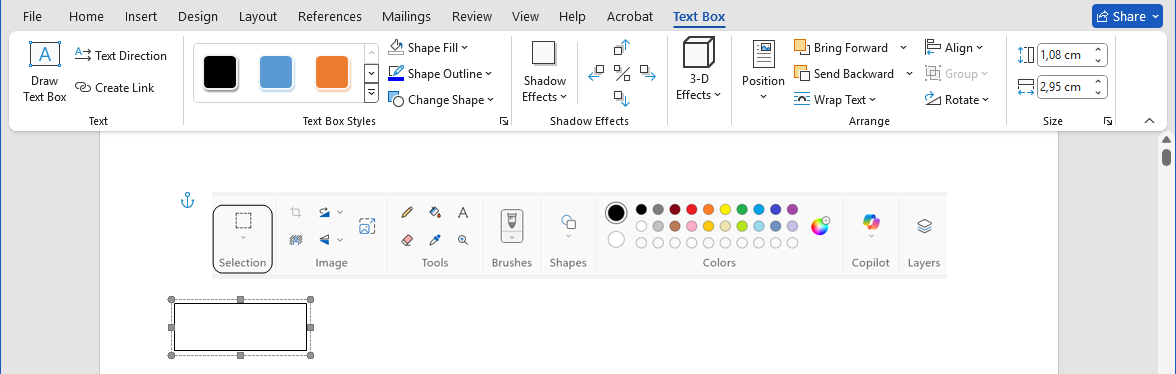
8. We need to make the shape's fill transparent. Select the shape, then go to the Shape Format tab. Click Shape Fill and choose No Fill (1).
9. The fill disappears, leaving only the outline. Perfect.
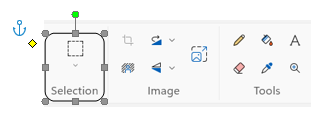
Our interface element now has a transparent outline with adjustment handles. You can resize, rotate, or move the outline using these handles.
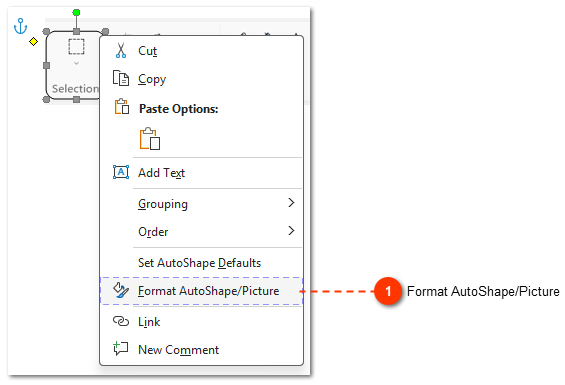
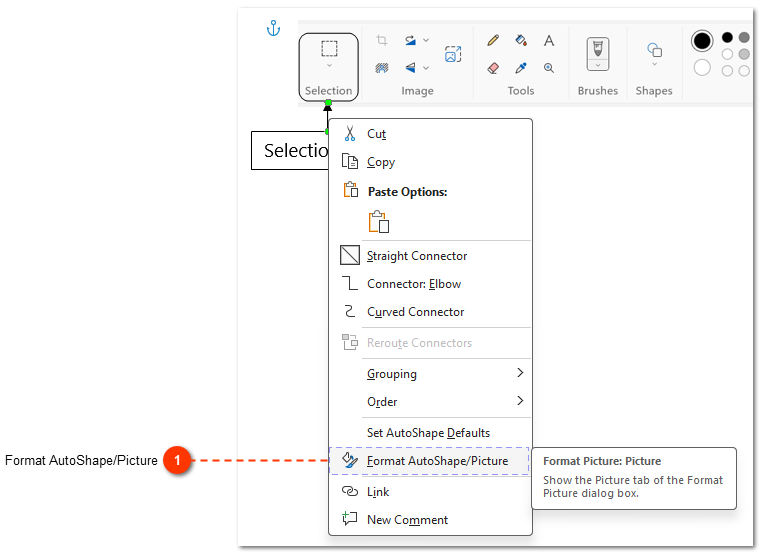
To change the outline's color, weight, or style, right-click the outline, select Format AutoShape (1) and use the Shape Outline options.
Now, let's add a text label to the highlighted element.
10. Go back to the Insert tab (1), click Shapes (2) again, and this time choose the Text Box (3) tool.
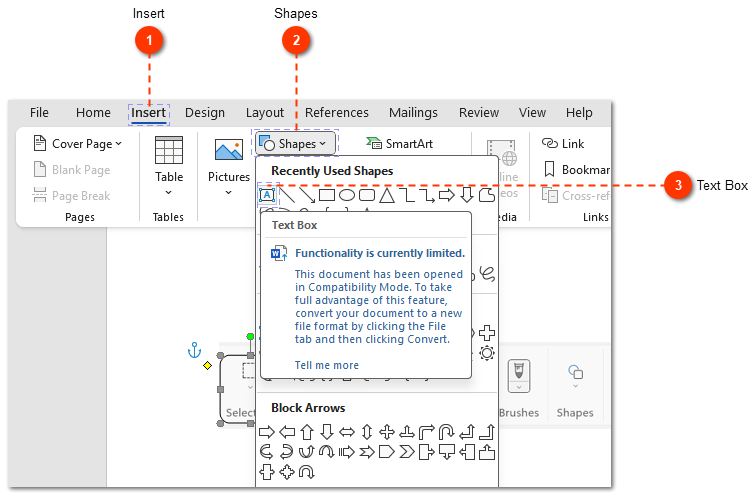
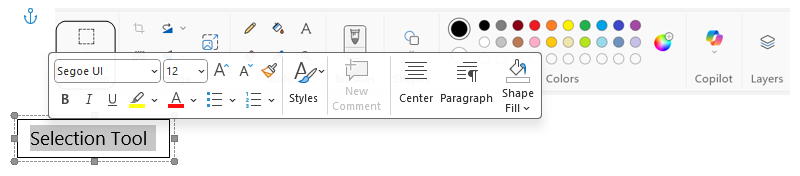
11. Click and drag on the screenshot to create a text box near your highlighted element. Type your label, for example, "Selection Tool".
If the text doesn't fit, reduce the font size, or drag the text box handles to make it larger.
You can also align the text box.
12. Finally, connect the label to the element with an arrow. Go back to Insert > Shapes and choose the Line Arrow (1).
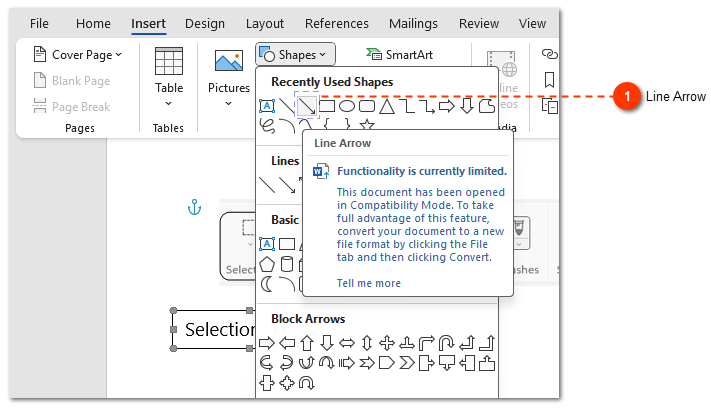
13. To draw a perfectly straight vertical (or horizontal) arrow, hold down the Shift key while you click and drag from the text box to the highlighted element. Here's the result.
You can format the arrow using its adjustment handles or by right-clicking it and using the Shape Outline options to change its color, thickness, and style.
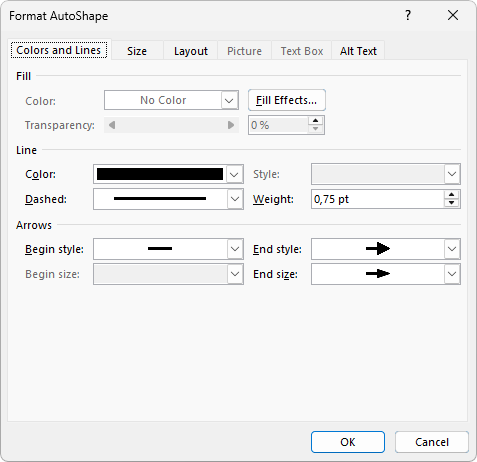
Format AutoShape popup:
Done!
Dr.Explain - a faster tool for creating user documentation with annotated screenshots
Annotating a few screenshots in Word is straightforward. But for creating entire user manuals with many images, it's not the most efficient method.
The manual process in Word took 13 steps. An automatic tool like Dr.Explain can do the same thing in just 2 clicks. Compare for yourself:
- Manual way: capture, insert, draw shape, remove fill, add text box, add arrow...
- Automated tool (Dr.Explain): capture screen -> add descriptions.
Dr.Explain is a dedicated help authoring tool. It captures an application window (or a selected area), automatically recognizes interface elements like buttons and menus, and lets you add numbered callouts and descriptions instantly. The result can be exported to popular formats including HTML, PDF, and CHM.
This is just one of its features, but it's enough to see how an automated tool can save you hours of manual work. Video of how annotating screenshots in Dr.Explain works:
You can see examples of user documentation created with Dr.Explain.
Download Dr.Explain for free and start creating professional user documentation today. Export your user guide projects in popular formats without programming.
Frequently asked questions
1. How to add automatic captions (like "Figure 1") to my screenshots in Word?
Yes, Word has a built-in feature for this. You can insert a caption by going to the "References" tab and clicking "Insert Caption". This will create labels like "Figure 1 – Main Window" that renumber automatically if you add or remove other images. However, this feature only handles the caption text, not the visual callouts (like arrows or boxes) used to highlight specific elements, which still need to be added manually.
2. Arrows and text boxes move away from the screenshot when I drag it. How can I keep them in place?
This happens because the screenshot and your annotations are treated as separate objects. To fix this, you need to group them. Select the screenshot, then hold down the "Ctrl" key and click on each annotation (shapes, text boxes, arrows) to select them all. Right-click on any of the selected items, choose "Group" from the menu, and then select "Group" again. Now, all the elements will move together as a single unit.
3. Is this manual method efficient for creating a user manual with over 50 annotated screenshots?
Technically, yes, it will work. But it's not efficient. For a large project, you'll spend hours repeating the same 13 steps for every single button or field on every screenshot. The process becomes tedious and time-consuming. While Word is fine for a quick one-off annotation, it's not the right tool for producing a comprehensive, professional user guide with dozens of annotated images.
4. Is there a faster way to create annotated screenshots?
Absolutely. Specialized software exists precisely for this task. These tools are called "help authoring tools." For example, Dr.Explain, mentioned in the article, automates the entire process. It captures the application window, analyzes its structure to automatically detect buttons and controls, and instantly generates numbered callouts for each one. You can then add your descriptions and export the results to multiple formats like online help or PDF. Try Dr.Explain for free.
5. What are the main advantages of using a modern tool like Dr.Explain?
The main advantage is automation. For example Word is a manual process (as shown in the 13 steps above). Dr.Explain automates:
- screenshot capture,
- interface element detection,
- callout generation