


Context help is a user manual that is embedded into the web application or a website and provides «just in time» access to the information about specific page elements, attributes, or icons.
What are the benefits of using context help in a web application?
- Context help reduces the time and effort spent on customer technical support.
- Context help adds to the product's simplicity and visibility.
- Context help helps the customers to get the most out of your software
Technology application
The technology, described in this article, allows integrating help manual created with Dr.Explain right into a web site or a web application. You can easily bind clickable help icons to certain page sections or controls which require explanations.
Please, check how the technology works in a sample web application at https://www.drexplain.com/demos/context-help-for-web-apps/
Also, find help documentation for this sample web app at https://www.drexplain.com/demos/context-help-for-web-apps/help/
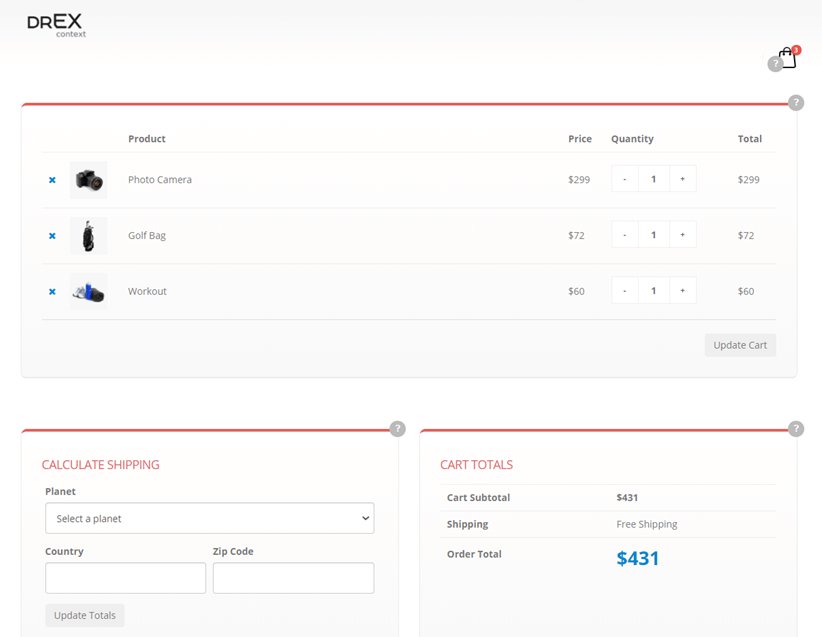
On the screenshot, the (?) icon is an example of the context help element.
Step 1: Ins ert Dr.Explain context web help script into the code of your web page
<script type="text/javascript" src="https://addons.indigobyte.com/drexplain/decontext/v0.1.2/decontext.min.js" data-decontext-url="..."></script>
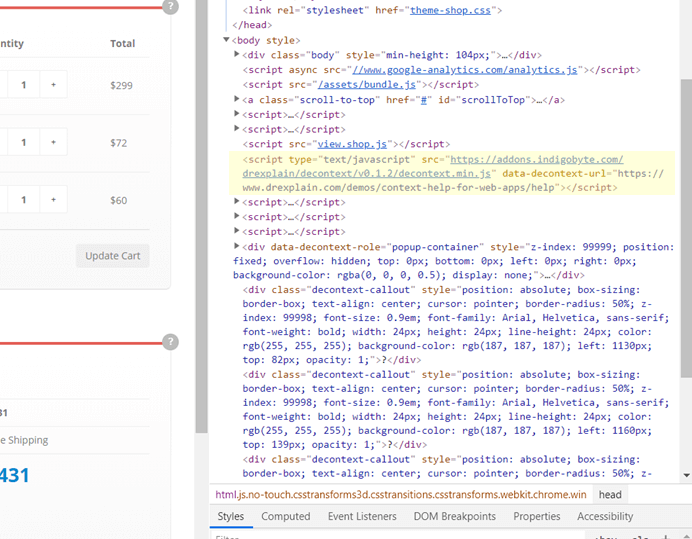
In the data-decontext-URL parameter se t the URL of your online manual made by Dr.Explain.
The online manual can be published either on your product website or on tiwri.com technical writing platform.
Note: please turn on Print version pages in Dr.Explain HTML export settings. It is the print version pages that are displayed in the context help pop up windows due to their minimalist and clean design.
Step 2: Insert Dr.Explain context web help script in to the code of your web page
To attach a clickable help icon with a help topic pop up to an HTML element (e.g. input, div, table or else) just add the special attributes to its HTML tag like shown below:
 <div
    data-decontext="true"
    data-decontext-position-x="right"
    data-decontext-position-y="top"
    data-decontext-filename="topic.html"
>...</div>
The attributes:
data-decontext — enables/disables the context web help icon for the element.
data-decontext-position-x — horizontal position of the help icon relative to the element (left, center or right (default val ue))
data-decontext-position-y — vertical position of the help icon relative to the element (top (default val ue), center or bottom)
data-decontext-filename — online manual help topic file name to be shown in the popup window
data-decontext-bgcolor — help icon background color. The default color is #bbb (light gray).
data-decontext-fgcolor — help icon text (question mark) color. The default color is #fff (white).
data-decontext-width — help icon width. The default width is 24 pixels.
data-decontext-height — help icon height. The default height is 24 pixels.
Step 3. Publish your web page changes
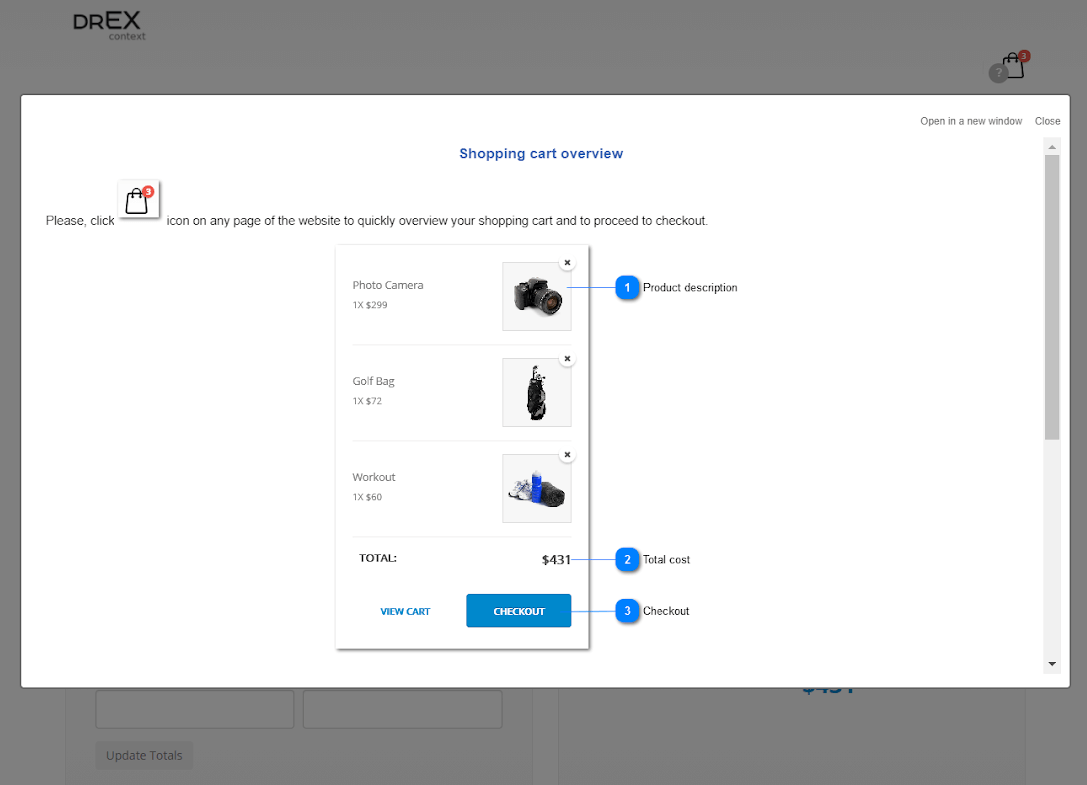
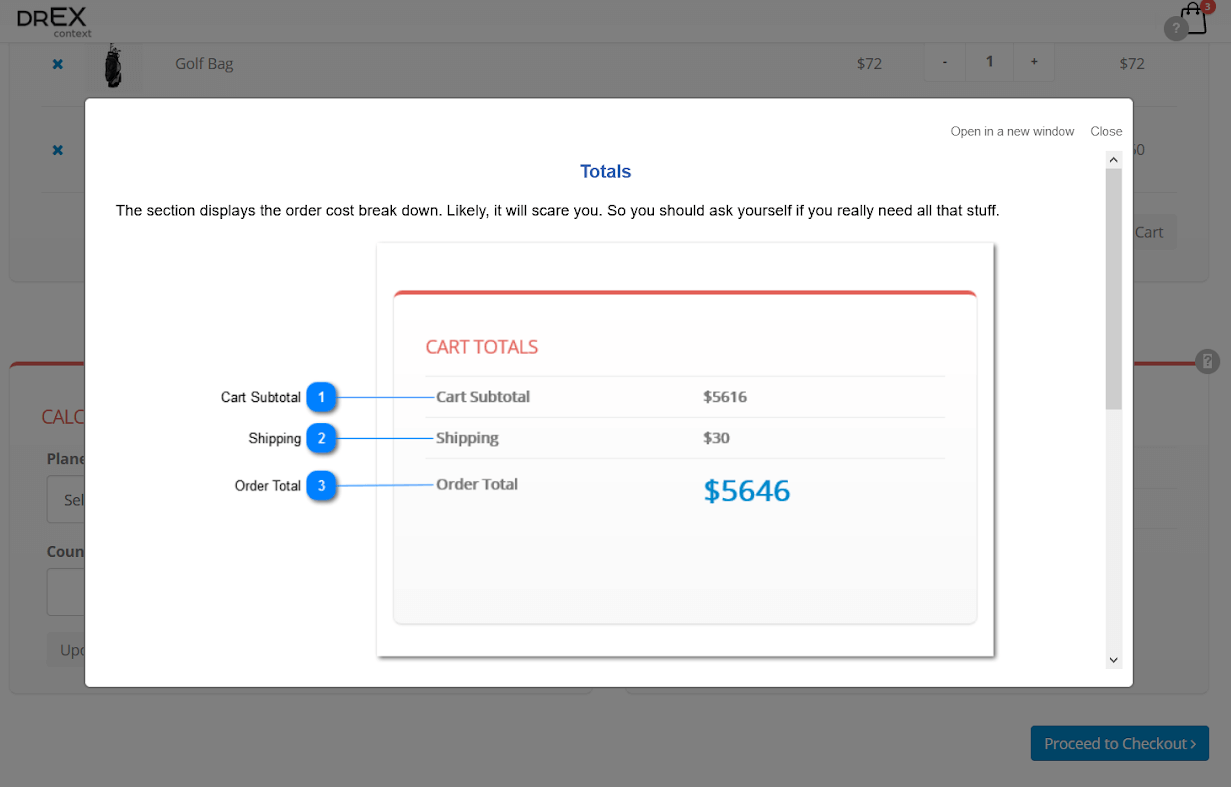
Once the changes are published a help icon will be shown on the required page elements.
The popup window with a certain help topic will be shown once a user clicks the help icon.
Note: decontext.js script is subject to change and improvements.
Conclusion
To sum it up, this technology is easy to handle and apply.
Just follow the above mentioned simple steps and make your web application more helpful and functional. We recommend visiting Dr.Explain help documentation from time to time to keep abreast of its changes and modifications.