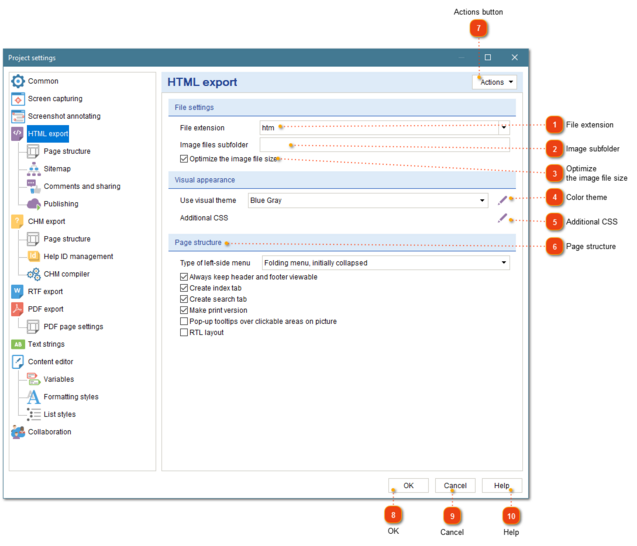
In this field, specify the subfolder where the image files will be stored.
If your HTML files will be available via http://site.com/help link and you want to images to be available via URLs like http://site.com/help/img/image.png then specify img in this field.
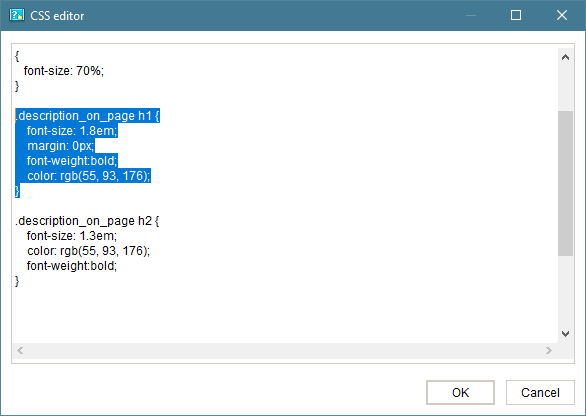
Press this button to specify your own CSS code to override CSS generated by Dr.Explain. You can customize the appearance of HTML pages: fonts, colors, sizes, etc.
Use this section to configure the structure of the page: show or hide the menu (and select its type) and index tab.
If you select checkbox Always keep header and footer viewable, the height of the generated pages will be automatically adjusted to fit to the height of the browser window. The header, footer and sidebars will be docked to the window's sides while the central content part will remain scrollable.
Select checkbox Pop-up tooltips over clickable areas to enable pop-up tooltips that will be displayed when the mouse pointer moves over the callout on the annotated screenshot. The tooltips will display the associated control description, so that the user doesn't have to scroll the page down to read it.
The Print version option is available for HTML export only.
Select None to not create Search tab in exported HTML files.
Select Basic search to create Search tab. Search will be performed entirely in the browser (client-side). No additional server configuration is required.
Select Advanced search to create Search tab. Search will be performed on the server, search results will contain search snippets with search keywords highlighted. Find out more here.
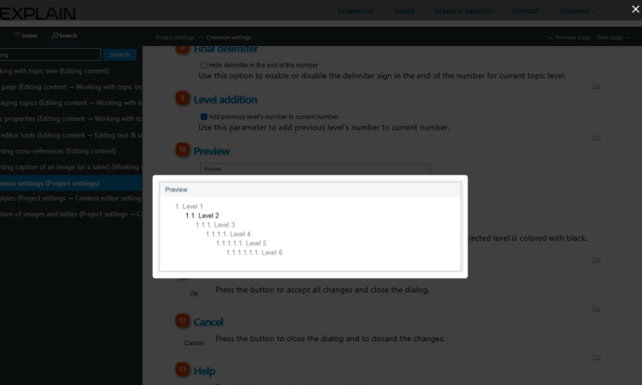
 in HTML preview. Here is what it looks like: