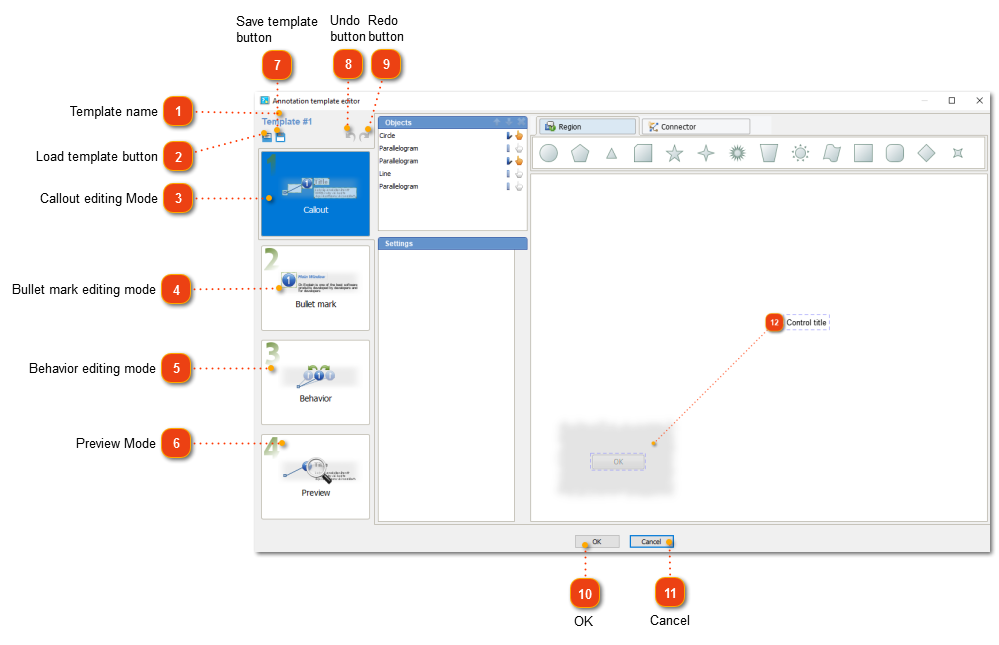
Annotation template editor
If you need to change the appearance of callouts shown on the annotated screenshots, you can do that in annotation template editor.
When you save changes to the annotation template, all annotated screenshots that use this template will be automatically updated to match its new settings.
Edit the settings of screenshot annotation in this window. There are four main modes for editing the annotation template:
Each of them is covered later in the corresponding subtopics.
To open the screenshot annotation settings window, use one of the following methods:
The following dialog window will appear:
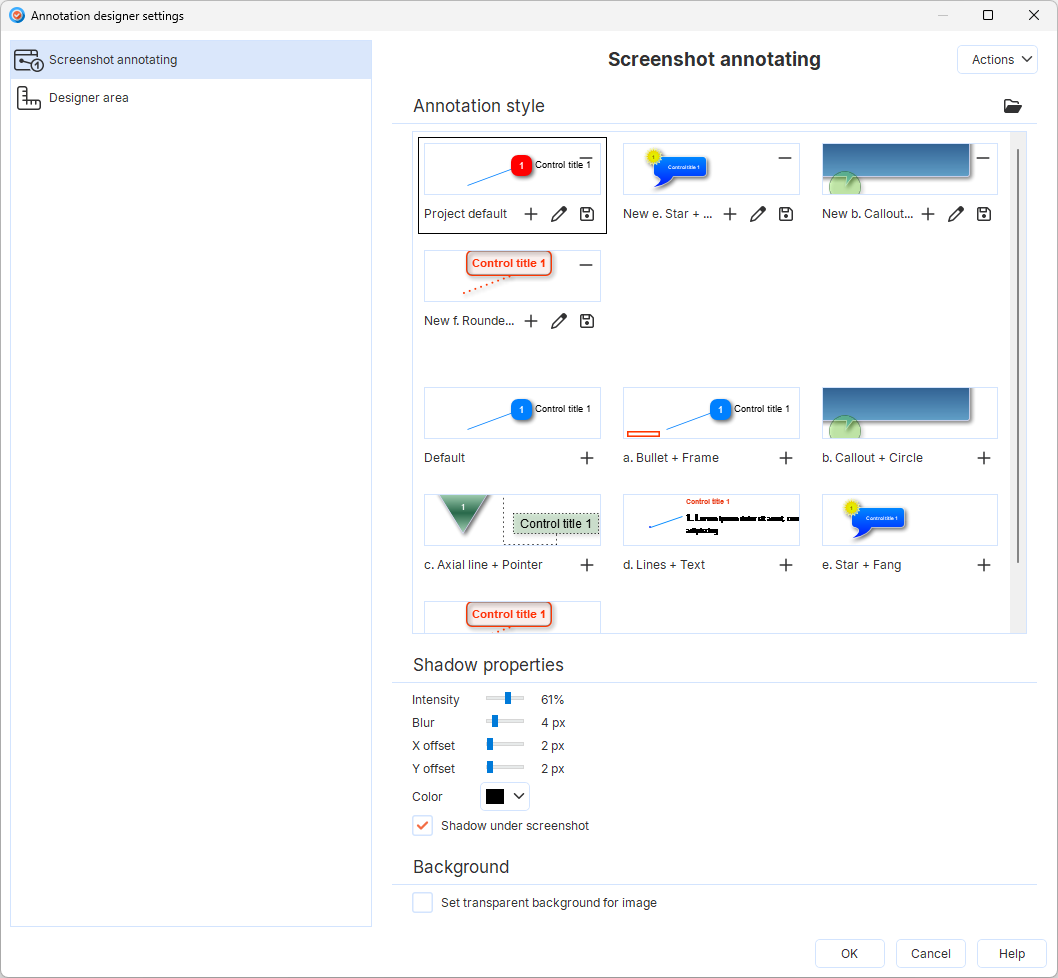
In this window, click  button in the lower-right corner of the template.
The following dialog window will appear: