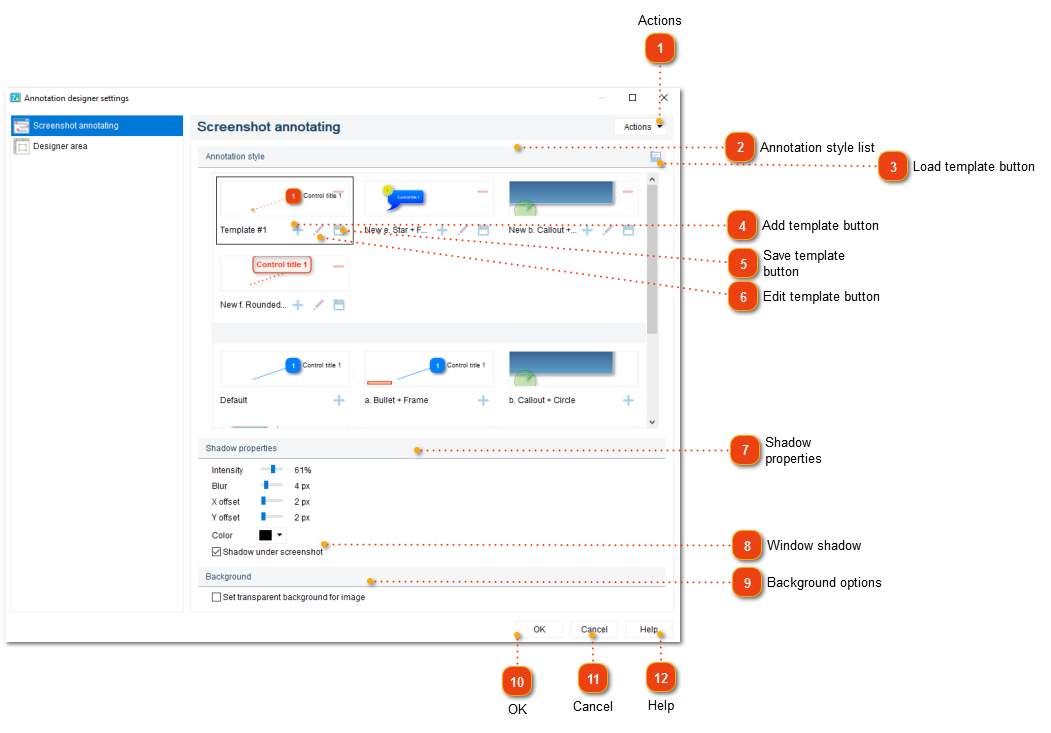
In this dialog you can customize the appearance of callouts and icons displayed in the control description area. Click the annotation designer settings button in the Designer toolbar when working in Designer mode to customize the appearance of the current annotated screenshot only. You can go to menu Project -> Project Settings and then switch to Screenshot annotating tab in the Project settings dialog to set the default annotation template for your project. It will be applied to all newly created annotated screenshots.
You can modify Dr.Explain's annotation templates or create your own using the Annotation template editor.
Annotation style list
Here you can view all available annotation styles, add them to your project and edit them.
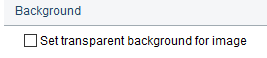
Check this option to make the background under the annotated screenshot transparent (when this is not checked, the screenshot will have white background). This might be necessary when the annotated a screenshot is displayed on non-white background (for example, inside a table cell with colored background).
Here is what the exported document will look like when page has gray background and Set transparent background for image is not checked:
If you select that option, the exported page will look like this:
 button in the Designer toolbar when working in Designer mode to customize the appearance of the current annotated screenshot only. You can go to menu Project -> Project Settings and then switch to Screenshot annotating tab in the Project settings dialog to set the default annotation template for your project. It will be applied to all newly created annotated screenshots.