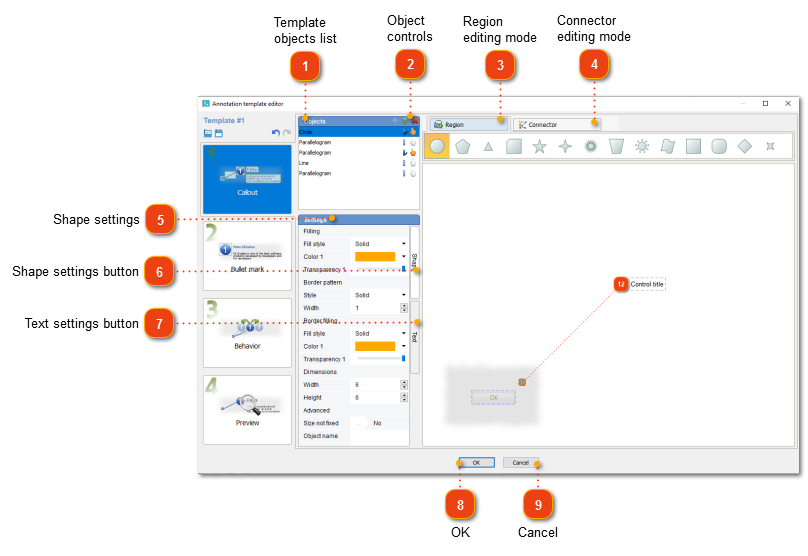
Use this dialog to configure settings for the callouts in your screenshot annotation template. You can change the shape and color of the objects and connectors used in the callout. You can also edit the text used for the specific callout object.
To display this window, go to Screenshot annotating, click the annotation template you'd like to edit and click the Callout mode.
The connection of two points of objects is oriented: the result of the middle right point of the blue square in the picture below and the middle left point of the area with the name of the control depends on which object will be dragged to which. Dr.Explain performs position calculations, assuming that the dependent object is the one that was attached (in particular, to get a standard template from the program, you need to attach a rectangle with the control name to a square with the control number, but not vice versa).
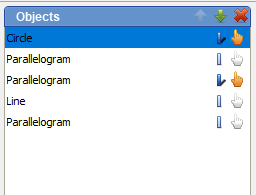
Template objects list
This field lists all available objects for the selected callout.
Use buttons to move the object in the list up and down.
Click button to remove the selected object.
Use button to toggle object's shadow.
Use button to make the object clickable in the HTML/CHM output. Also, hovering mouse over the part of the callout corresponding to the object with this icon in HTML/CHM output will bring pop-up tooltip (if that setting was enabled in HTML/CHM export settings).