Creating a shared project
There are several ways to create a new blank shared project:
-
in the Dr.Explain application go to menu File -> Create a shared project on the server.
-
click Create a shared project on the server on the startup screen in Dr.Explain.
To upload an existing local project to the server open the project in Dr.Explain, then use one of the following methods:
-
go to menu Collaboration -> Upload project to the server.
The following dialog window will appear:
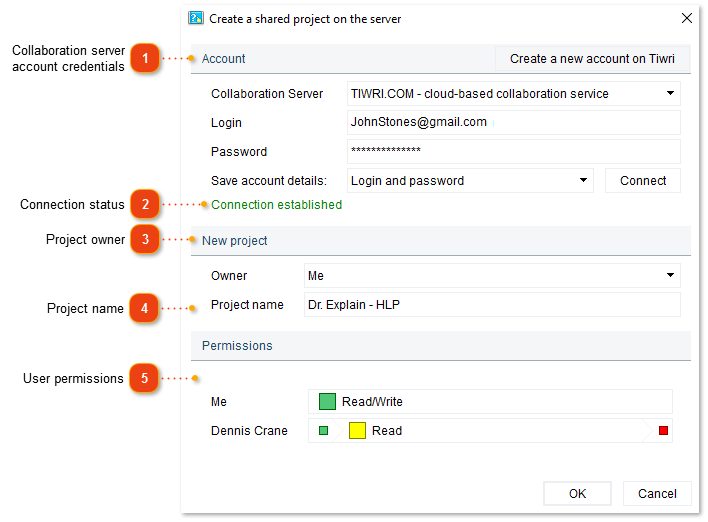
Collaboration server account credentials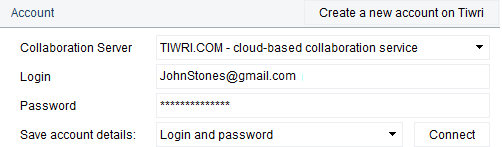 Enter your login and password and click Connect.
If you work with the Dr.Explain Collaboration Server, you might need to setup access first.
|
Project ownerUse this drop-down list to assign the project owner role either to yourself or to someone who made you a manager in his/her Tiwri.com account. Read more about managing user rights.
|
Project nameUse this field to specify the project name here.
Later, you can change it in Documents section in your Tiwri.com account or in the document settings management section of Dr.Explain Collaboration Server.
|
User permissions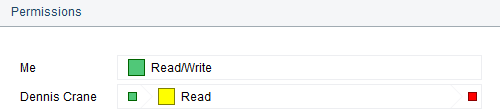 Use this section to set a permission type for each collaborator. Click the color box to set a certain permission type. You can add new collaborators and also change permissions in Documents section in your Tiwri.com account.
If you work with Dr.Explain Collaboration Server, then only the server administrator can update user access rights.
|