Inserting cross-references
A cross-reference is a reference to a numbered object (an image or a table) located in the current topic or in another part of the documentation. Typically, a cross-reference contains an object number that is automatically recalculated when the numbering in the document changes.
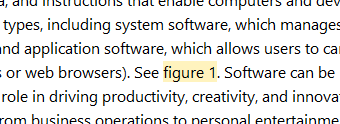
On the screenshot below the cross-reference "figure 1" refers to the corresponding image located in another part of the documentation:
In the content editor you can navigate to an object referenced by a cross-reference via Ctrl+Click. This is a standard behavior of link functionality in the editor.
Cross-references are exported as ordinary hyperlinks.
To add a cross-reference, use one of the following methods:
-
drag-and-drop — useful if a cross-reference and a numbered object are in the same topic;
-
copying a cross-reference to a numbered object via the clipboard — useful if you want to add a reference to a numbered object in another part of the documentation;
-
inserting a cross-reference using the
 button in the editor toolbar — convenient if you want to insert a cross-reference to a numbered object located in another part of the documentation.
Inserting a cross-reference via drag-and-drop
To add a cross-reference this way, hold down the caption of the numbered object with the left mouse button and drag it to the desired place in the current topic.
Inserting a cross-reference via copy-paste
To add a cross-reference in this way, follow these steps:
-
right-click anywhere on the numbered object;
-
in the context menu select Copy cross-reference to this object;
-
position the caret where you want to insert the cross-reference;
-
insert a cross-reference via menu Edit -> Paste or Ctrl+V.
Inserting a cross-reference using a button in the editor toolbar
To add a cross-reference in this way, follow these steps:
-
the Add cross-reference dialog box opens listing all numbered documentation objects:
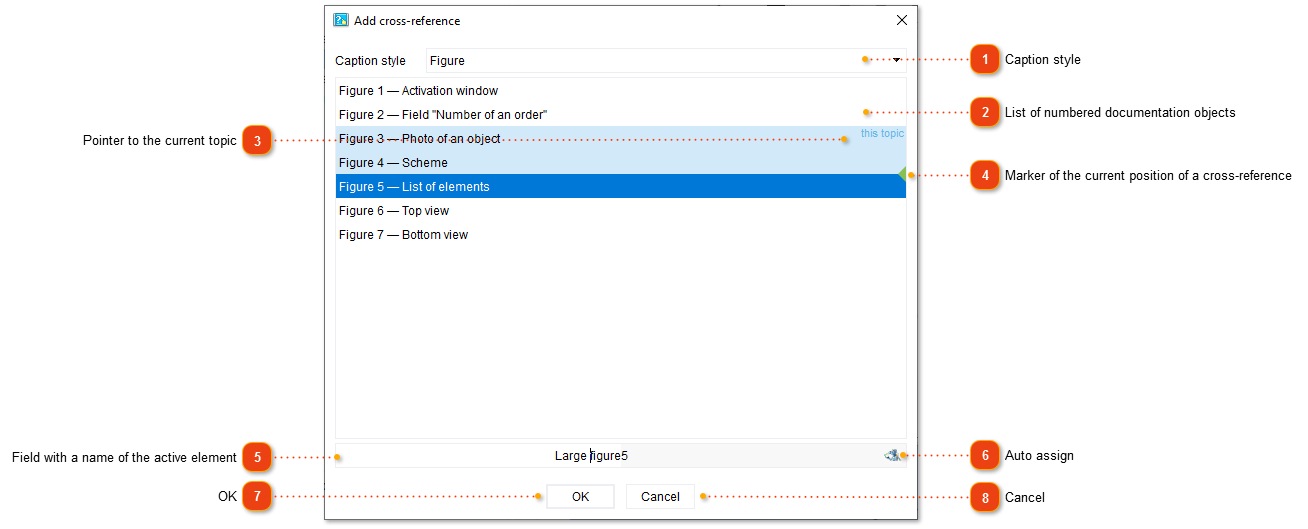
-
select the desired object from the list;
-
click OK.
Caption styleList of cross-reference caption styles. By default, two styles are available: Figure and Table.
Using this drop-down list you can filter objects by their style.
For more information about working with cross-reference styles, see Captions of images and tables.
|
Changing cross-reference
To change the cross-reference, open the Add cross-reference dialog box. You can do this in one of the following ways:
-
double-click the cross-reference;
-
right-click the cross-reference in editor and select Cross-reference properties... from the context menu.
Next, select the desired object and click OK.