go to the Project menu and click the Project settings menu option;
use Ctrl+Alt+P keyboard shortcut.
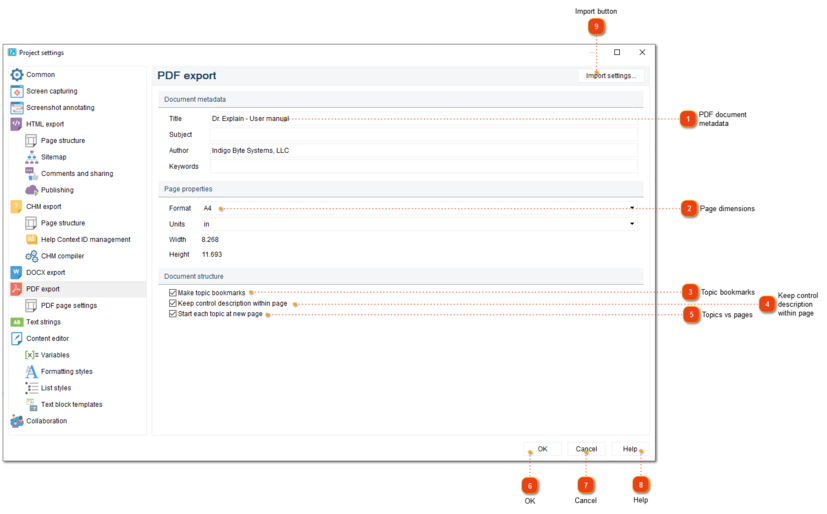
Project settings dialog should appear. On the left side of it go to PDF export.
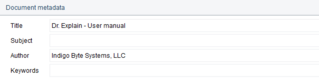
PDF document metadata
Use this section to enter the PDF file metadata, such as Title, Subject, Author, and Keywords. This data will be shown in the properties of the exported PDF file, but it won't affect the document layout or visible content.
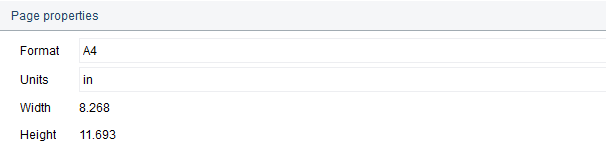
Use this section to specify dimensions for PDF pages. The list of page formats are taken from the settings of the printers connected to the computer (including virtual ones).
To set landscape orientation, select a paper format from the drop-down list, the name of which contains the word "Inverted" or "Rotated". For example, for A4 landscape orientation, select"A4 Rotated".
If you need to use landscape orientation for a page because of an image in it, consider rotating the image 90 degrees in a third-party image editor and paste this rotated image into Dr.Explain.
If that doesn't suit your needs, you can add image as-is, and then set landscape orientation for individual pages of the exported PDF document by editing this PDF document in a third-party PDF editor application.
Check this option to keep the description of entire control within the same page in the PDF file. If there is already some content on the page, and the entire control description can't fit in the remaining part, the control description will start on the next page.
If you disable this checkbox and then add a page break at the very beginning of the topic, then in the exported PDF file the page number in the table of contents may look wrong: it will be the one where the contents of the previous topic ends (since the topic starts with a page break).
Check this option to specify if each topic must be started on a new page. If you clear this option, the next topic will start right after the previous one, on the same page. You can insert page breaks manually in the text editor for topics you want to start from the new page.