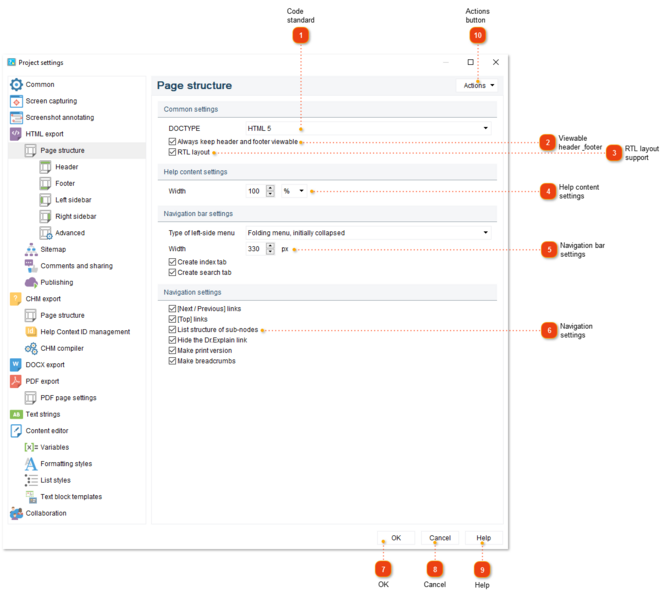
In the HTML export -> Page structure and CHM export -> Page structure section of Project settings dialog you can configure various parameters that affect appearance and structure of exported HTML and CHM files like "Menu", "Index", and "Search" tabs, breadcrumbs, etc.
To open the project settings, use one of the following methods:
If you select this checkbox, the height of the online manual will be automatically adjusted to fit to the height of the entire page. The header, footer and sidebars will be docked to the top and bottom of the page while the central content part will remain scrollable.
Check this option to enable right-to-left layout for the exported pages. Navigation elements (e.g. links, breadcrumbs etc) will be displayed layed out from right to left.
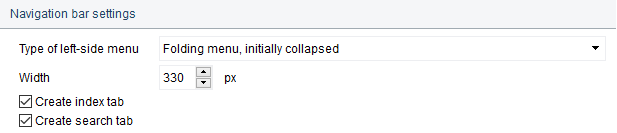
Use this section to configure the structure and dimension of the left navigation sidebar. In this section you can manage the visibility of elements in the exported files: show or hide the menu and index tabs. You can also configure the menu type here: static or dynamic (i.e. collapsible).
The menu width and type options are available for HTML export only.
 in HTML preview (or CHM preview). Here is what it looks like: