



Published: .
- What employees actually need from internal documentation
- Step 1. Set up the project and decide where the guide lives
- Step 2. Capture the screen your readers will see
- Step 3. Automatic callouts on interface elements
- Step 4. Turn each callout into a real instruction
- Step 5. Check how it looks before you publish
- The finished result: a step-by-step guide with screenshots
- After the screenshots: exporting and shortcuts
- Keyboard shortcuts worth remembering
- How it works in practice
- Frequently asked questions
What employees actually need from internal documentation
Think about the last time you had to learn a new internal system. You probably opened the help page, scanned it for thirty seconds, and then messaged a colleague instead. Not because the documentation was wrong — because it told you what the system does, not where to click.
That's the job this guide is about: when a new employee needs to complete a task in your enterprise automation system, they want to see the exact screen they're working with and know what to do on it, so they can finish the task without asking anyone for help. Annotated screenshots are how you deliver that. And the difference shows up immediately — the same employee opens the guide, recognizes the screen in front of them, finds the numbered element, and finishes the task. No colleague, no support ticket, no context-switching.
The usual ways to get there all work, but each has a cost. Plain screenshots with numbered circles drawn by hand take time to produce and even more time to update. A wall of text in a wiki is fast to write but slow to scan. A five-minute screen recording answers every question except the one the reader has right now. Dr.Explain takes a different route: it captures the screen, detects the interface elements automatically, and places numbered callouts on them. You write the descriptions. You don't draw arrows, align labels, or fight with layers.
If you already have documentation — a Word (DOCX) file, a set of wiki pages, a PDF manual — you don't have to start from scratch. Import it into a project and begin annotating where the existing text leaves gaps. The workflow below works the same way either way.
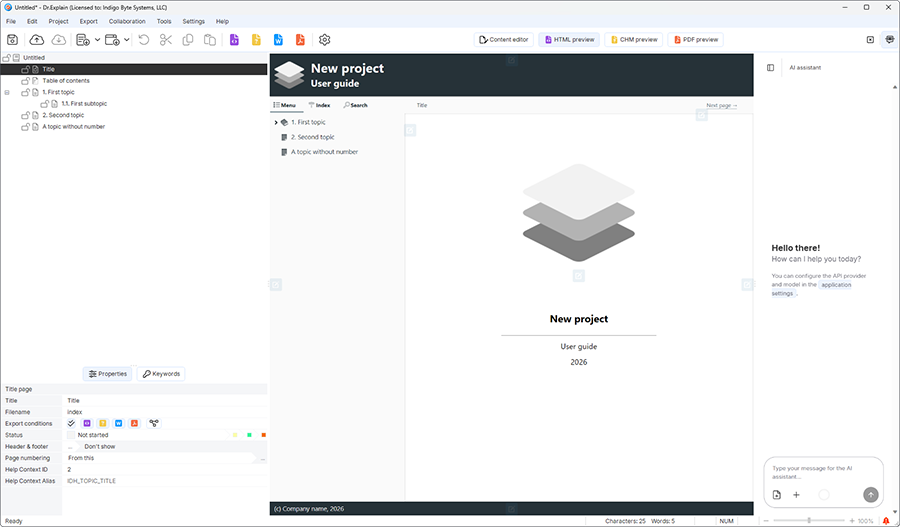
The rest of this guide walks through the actual workflow, from an empty project to a finished, publishable page.
Step 1. Set up the project and decide where the guide lives
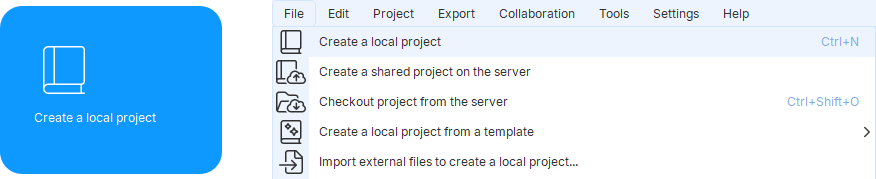
Open the project where your guide will live. If you're starting from scratch, go to File → Create Local Project, or click Create New Project on the start screen. For an automation system manual, an empty project is fine — you'll fill it in as you go.
To create a new project, click "Create Local Project" on the start screen. Alternatively, after launching the app, go to File → Create Local Project. You can also use the shortcut Ctrl+N. For the full list, see the Dr.Explain keyboard shortcuts reference.
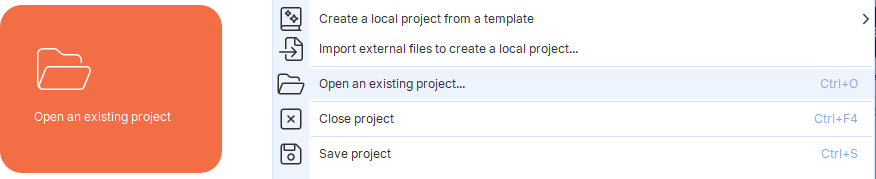
If you already have documentation to work with, click "Open An Existing Project" on the start screen. Alternatively, after launching the app, go to File → Open An Existing Project. The shortcut is Ctrl+O.
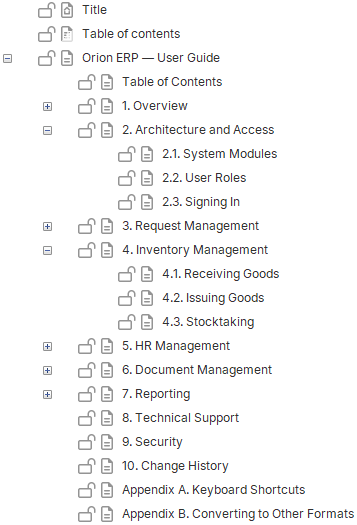
The left side of the window shows the topic tree. Pick the topic where the annotated screenshot belongs. If the guide covers several workflows, give each one its own topic — a reader looking for "how to submit a request" shouldn't have to scroll past three unrelated chapters to find it.
Step 2. Capture the screen your readers will see
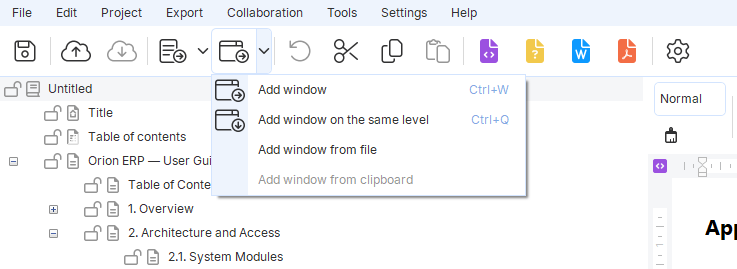
Open the automation system window you need to document. Switch back to Dr.Explain and click the Capture window button on the toolbar.
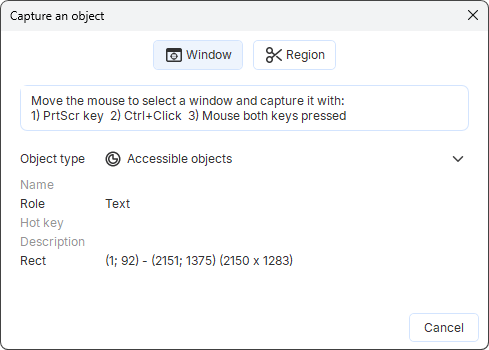
The system window appears on top of the Dr.Explain interface. Choose what to capture: the full window, or a part of it. For most enterprise system documentation, a specific form or dialog box is the right scope — a full-screen capture usually shows more than the reader needs and makes the callouts harder to follow.
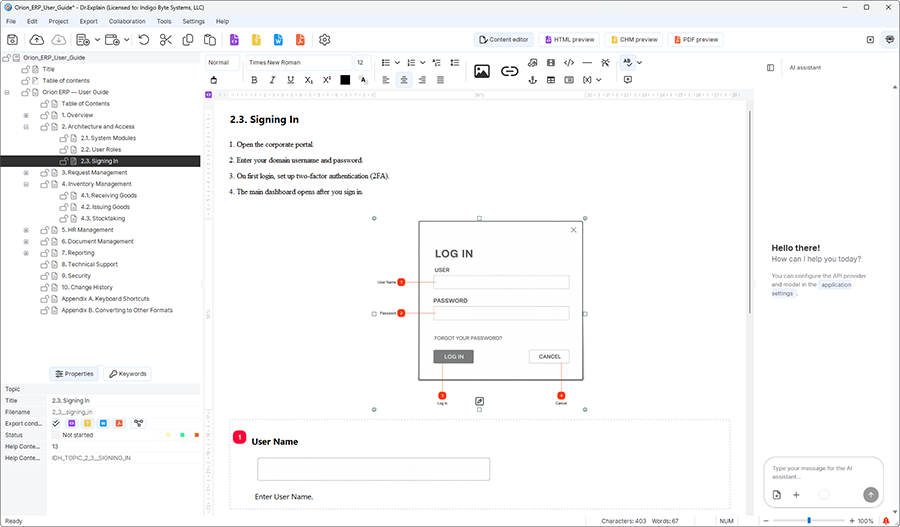
Once you've selected the area, Dr.Explain opens the documentation topic with the annotated screenshot already in place.
Step 3. Automatic callouts on interface elements
Immediately after capture, the program analyzes the interface structure and detects the key elements: buttons, input fields, menus, dropdown lists. Dr.Explain places numbered callouts on them automatically.
If a callout doesn't belong, delete it. If the program missed an element, add a callout manually. Numbering updates on its own, so you don't have to renumber anything. This is where the tool saves the most time — the tedious part of annotation is done before you start writing.
If you've been doing this in a graphics editor for years, the switch may feel unnecessary at first. The payoff shows up on the second or third update, when the interface changes and the annotations stay put.
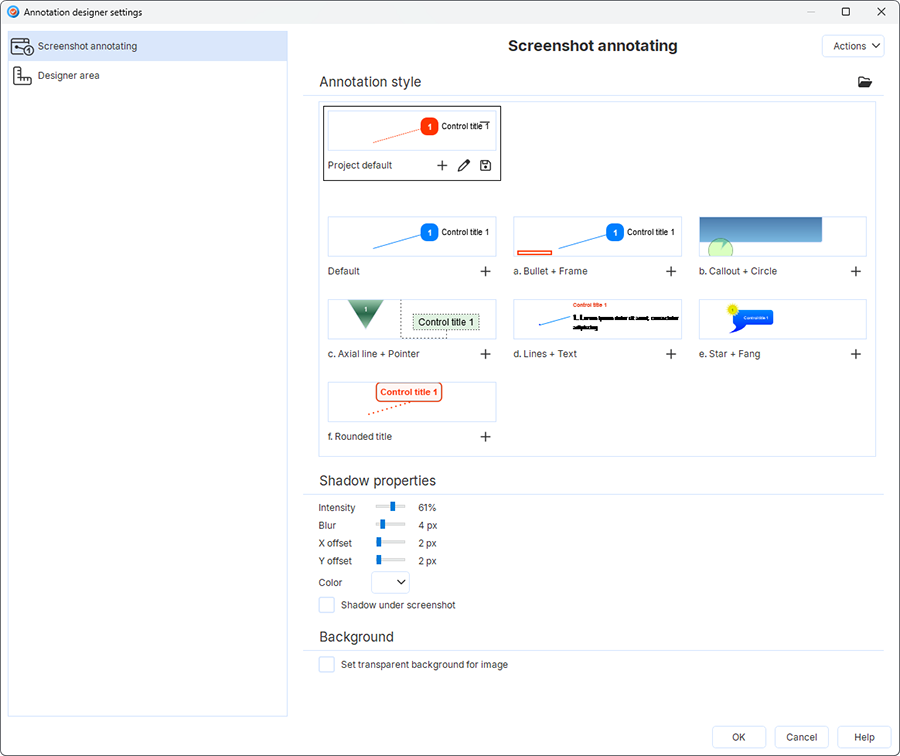
In the Annotation Designer settings, you can adjust how the callouts look: arrow styles, frames, label fonts. If your company has a documentation style guide, this is where you match it.
Step 4. Turn each callout into a real instruction
This is the part that turns numbers into a guide. For each callout, write what the element is and what happens when the reader clicks it or types into it. Button labels deserve the most attention — they're what new employees ask about first.
For an enterprise automation system, a callout on a button might read: "Click 'Create Request' to open the form for entering a new procurement request." A callout on an input field might read: "Enter the employee ID — the system will pull their details from the directory automatically."
The test for each description is simple: does it answer "what do I do here, and why?" If it doesn't, the reader will skip it — and the annotation becomes decoration.
Step 5. Check how it looks before you publish
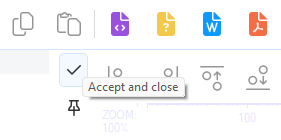
Click Accept and close in the Annotation Designer. The annotated screenshot is embedded in the topic, and the guide is ready to hand to employees.
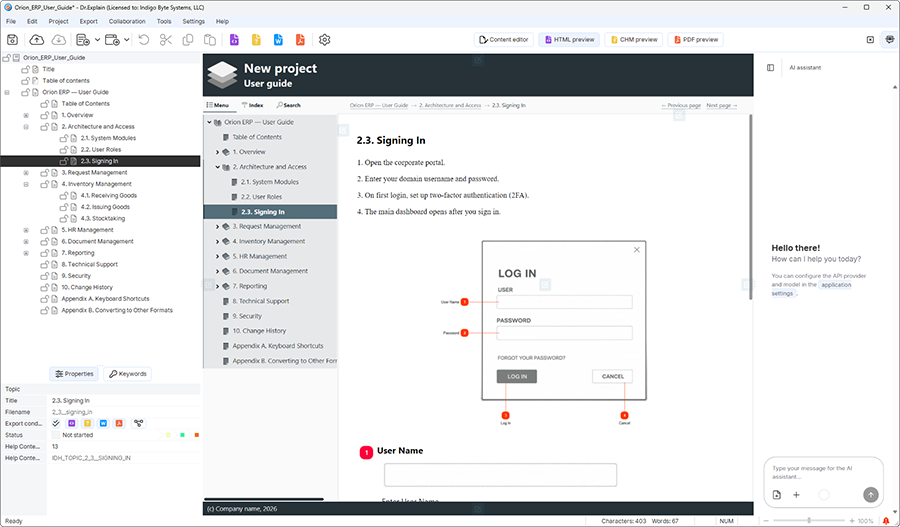
Before publishing, check the result in preview mode. Dr.Explain shows how the document will look in HTML, CHM, or PDF — pick the format from the preview panel and see it the way your readers will. If something needs adjusting, right-click the screenshot and select Edit to go back to the Annotation Designer.
The finished result: a step-by-step guide with screenshots
What you end up with is a page where the interface is numbered and every number has an explanation next to it. A reader opening the guide sees the screen they're working with and knows exactly where to start — no cross-referencing, no guessing which button is which.
The same screenshots work in online documentation and in printed reference cards. And when the system interface changes, you swap the screenshot and keep everything else. The callouts and descriptions stay where they were.
If you'd rather see the workflow in action, the tutorial video below covers the same steps in Dr.Explain.
After the screenshots: exporting and shortcuts
Once the screenshot work is done, the next question is usually where the document needs to go. Export it to the format that fits the audience:
- PDF — for printing and sharing a fixed version
- HTML — for a knowledge base or internal portal
- CHM — for embedded employee help
- Markdown — for version control and AI workflows
Two more settings are worth knowing at this stage. Conditional content output lets you include or exclude topics depending on who the document is for — useful when the same project produces both an admin guide and an end-user guide. The heat map shows which topics are finished and which still need work, so you can see the state of the whole project at a glance.
Keyboard shortcuts worth remembering
If you're adding topics one by one, the shortcuts below save the most time. Ctrl+T and Ctrl+D are the two you'll use most often — the difference is whether the new topic sits under the current one or next to it.
| Shortcut | Action | When it helps |
|---|---|---|
| Ctrl+T | Add a child topic | Building out a new chapter with subtopics |
| Ctrl+D | Add a sibling topic | Adding the next step in a sequence of equal parts |
| Insert | Add a subtopic | Going one level deeper inside the current topic |
| Enter | Add a sibling topic after the current one | Continuing a list of steps without leaving the keyboard |
How it works in practice
Orangecat. The first thing that caught their eye was how easily Dr.Explain handled screenshots: you only need to take a screenshot, and Dr.Explain will automatically split it into parts containing different controls. All you need to do is make annotations.
Hocus Pocus. A technical artist described how they use help files built in Dr.Explain. The capture tools with UI analysis extract all interface features into clickable zones with links in the help file that can be easily modified via the editor. There is no need to use a screen grab utility and Photoshop to edit screenshots and make visible zones and highlights — it is all automatic with Dr.Explain.
BioAware. The bioinformatician and product manager shared how they replaced a Word document with an interactive help file in Dr.Explain. A huge advantage of Dr.Explain involves showing a screenshot of the software's part, for example the main window of BioloMICS, and providing the information about each button or topic.
Frequently asked questions
How do I annotate screenshots for an internal automation system if the program didn't detect an element?
Add the callout manually — it takes one click in the Annotation Designer. Numbering updates automatically.
Can I change callouts after saving the screenshot?
Yes. Right-click the image and select Edit to open the Annotation Designer, where you can add, remove, or reorder callouts and edit descriptions.
What's the fastest way to update a screenshot when the system interface changes?
Replace the old screenshot with a new one — all callouts and descriptions stay in place, so you don't need to re-annotate anything.
Can I reuse one screenshot across multiple documentation topics?
Yes, you can copy the image into another topic. Callouts are preserved on copy.
What formats can I export a document with annotated screenshots to?
Dr.Explain exports projects with screenshots to HTML, CHM, PDF, and DOCX. Annotated screenshots look the same in every format — no extra configuration needed.
If I change a callout number, do I have to fix all the others?
No. Dr.Explain renumbers all callouts automatically.