


Annotate screenshots automatically
Dr.Explain captures application or web page window and annotates screenshots automatically — no need to switch between multiple tools for writing, screenshot capture, or labeling. Customize the appearance of auto-generated annotations using the built-in editor with dedicated styling tools.
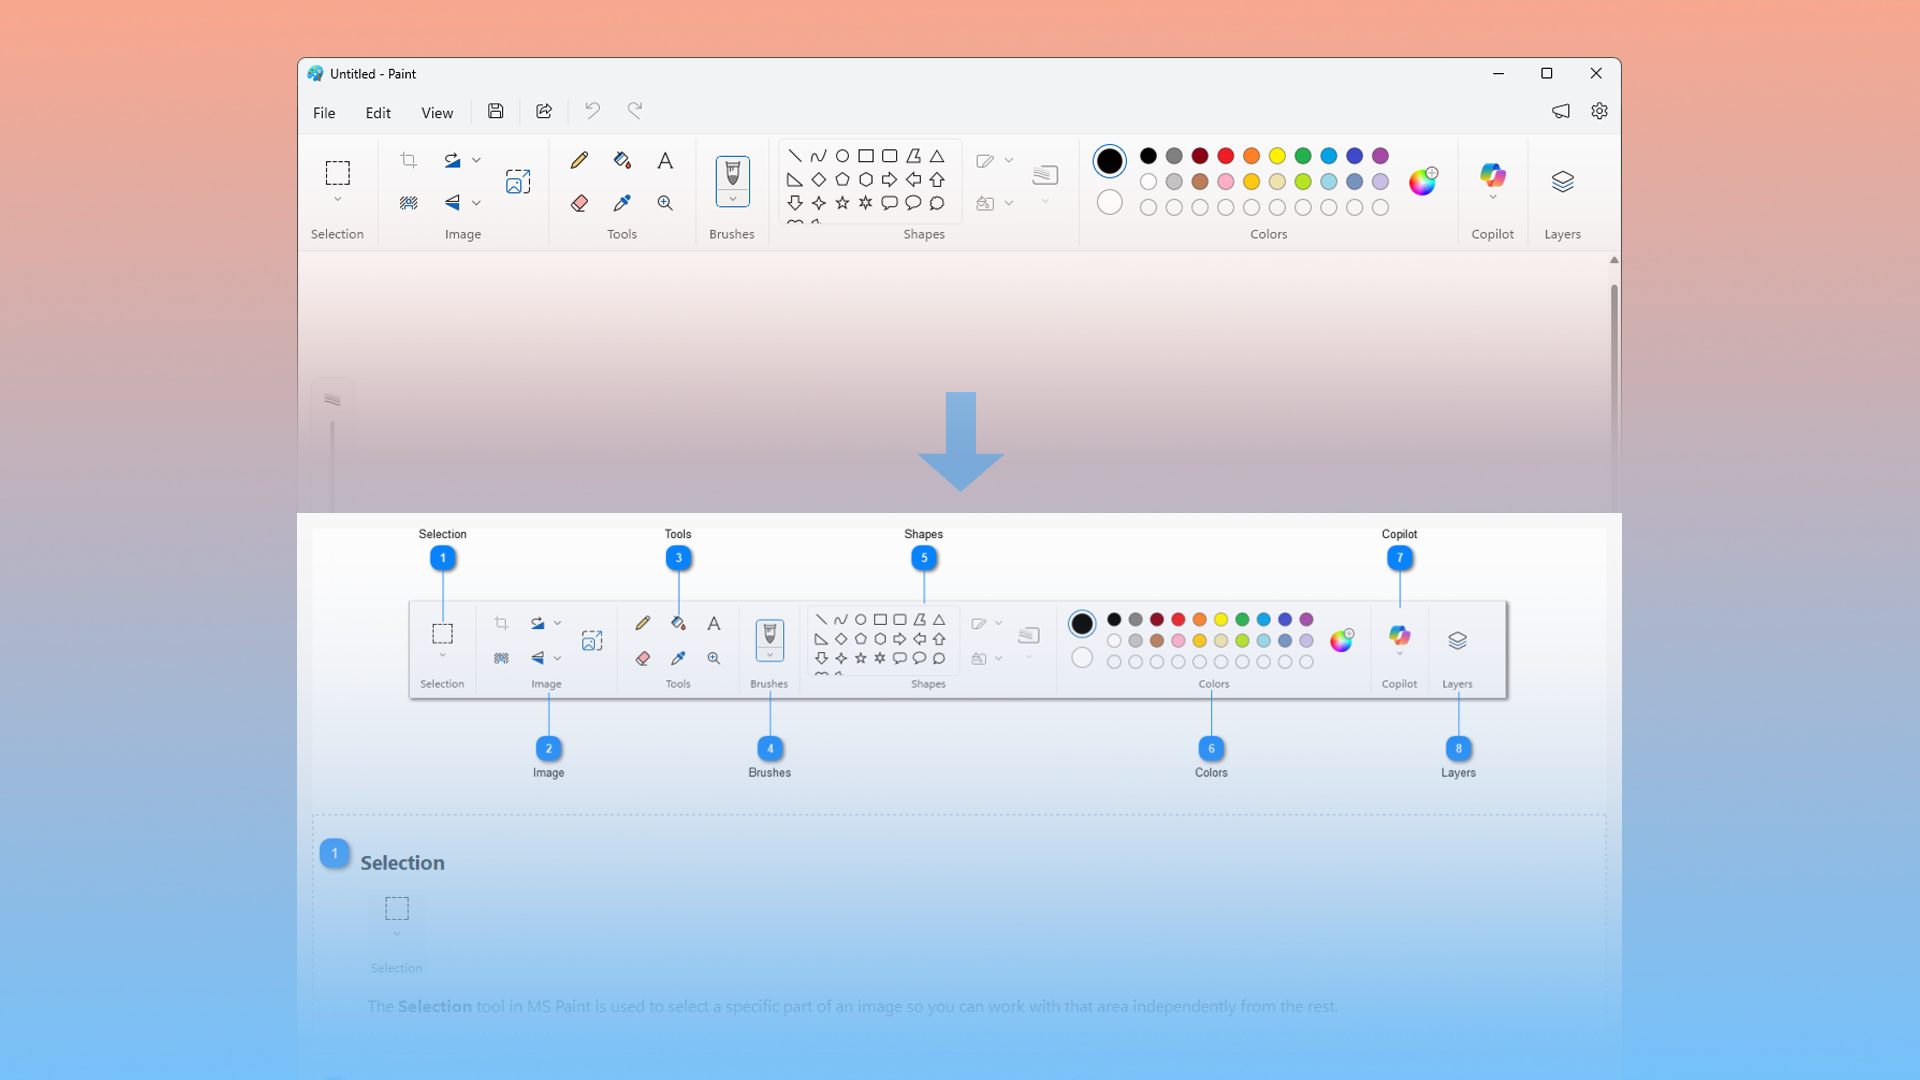
How does it work?
The built-in screen capture tool analyzes the structure of the desktop application window or online page and automatically generates numbered annotations for all key controls — buttons, fields, menus, toolbars, and more. All you need to do is add your descriptions.
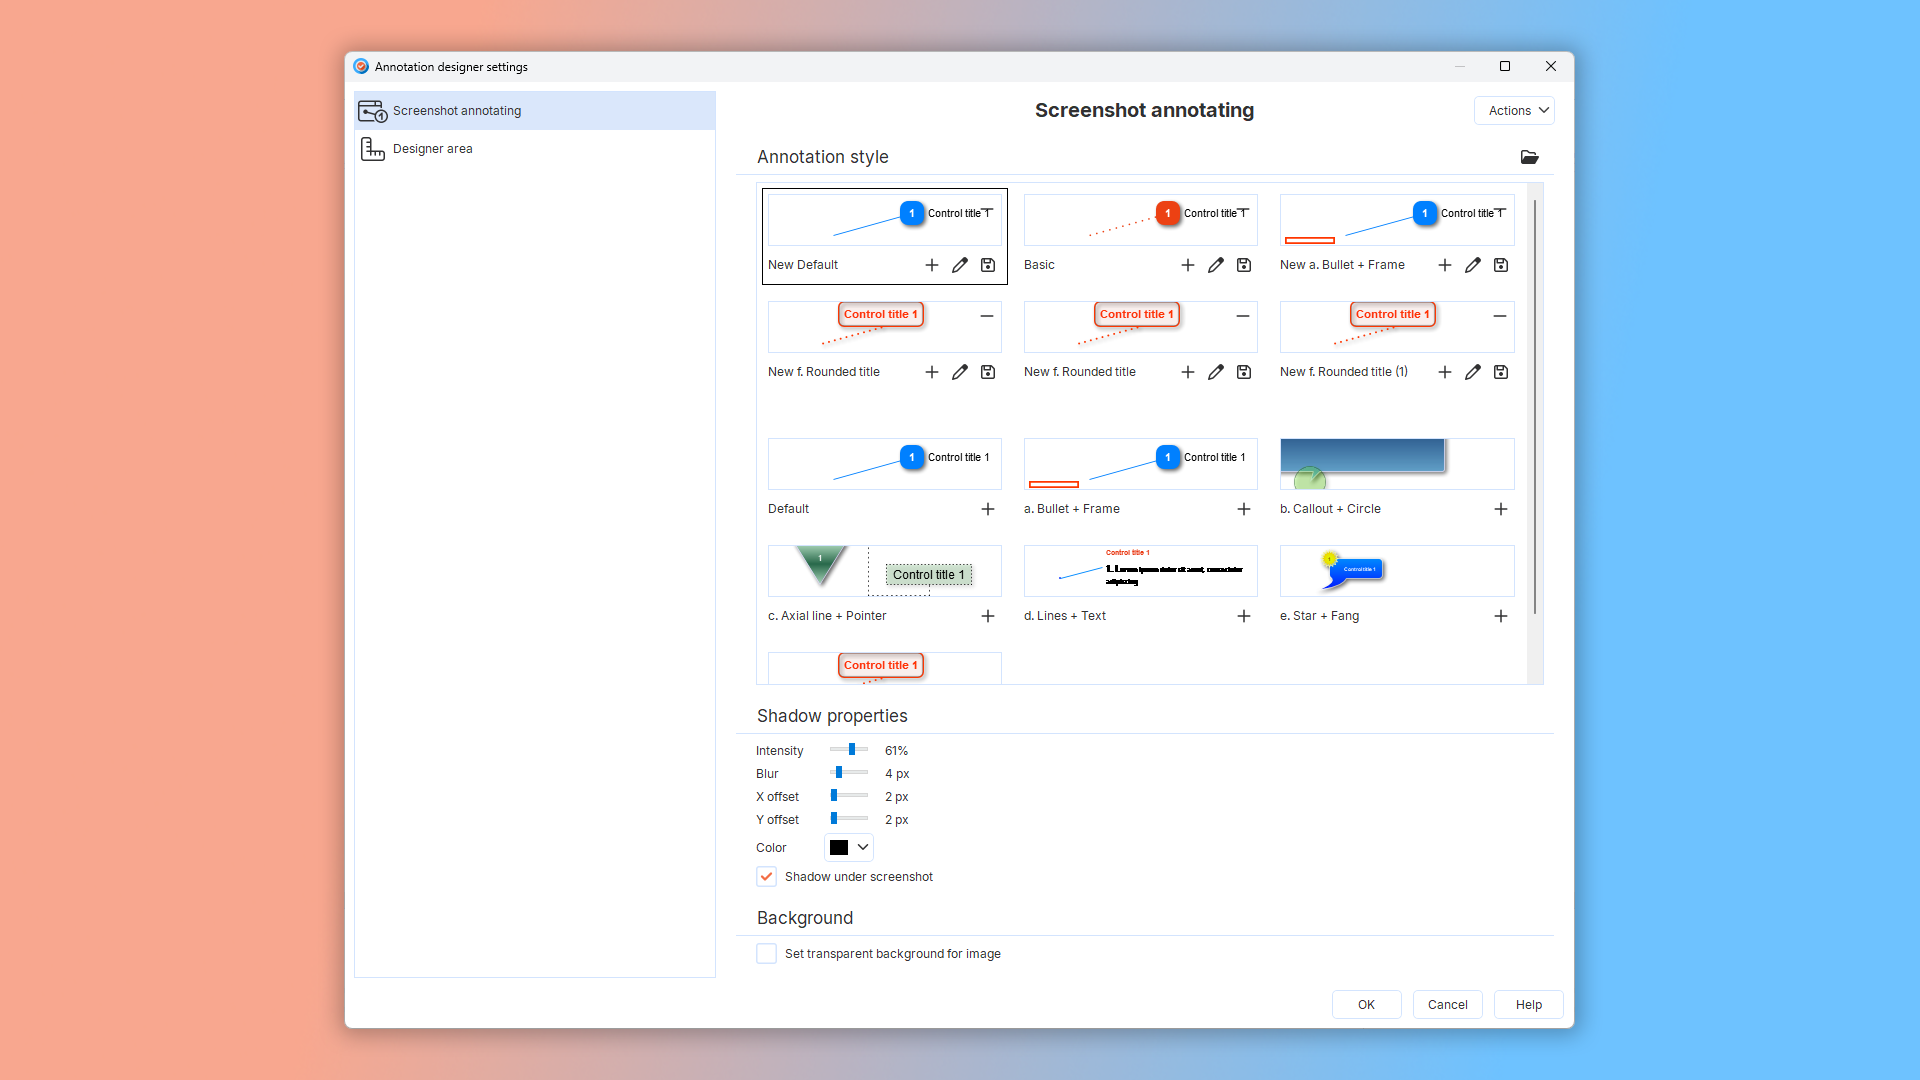
Annotation settings window in Dr.Explain:
You can also add annotations manually to images.
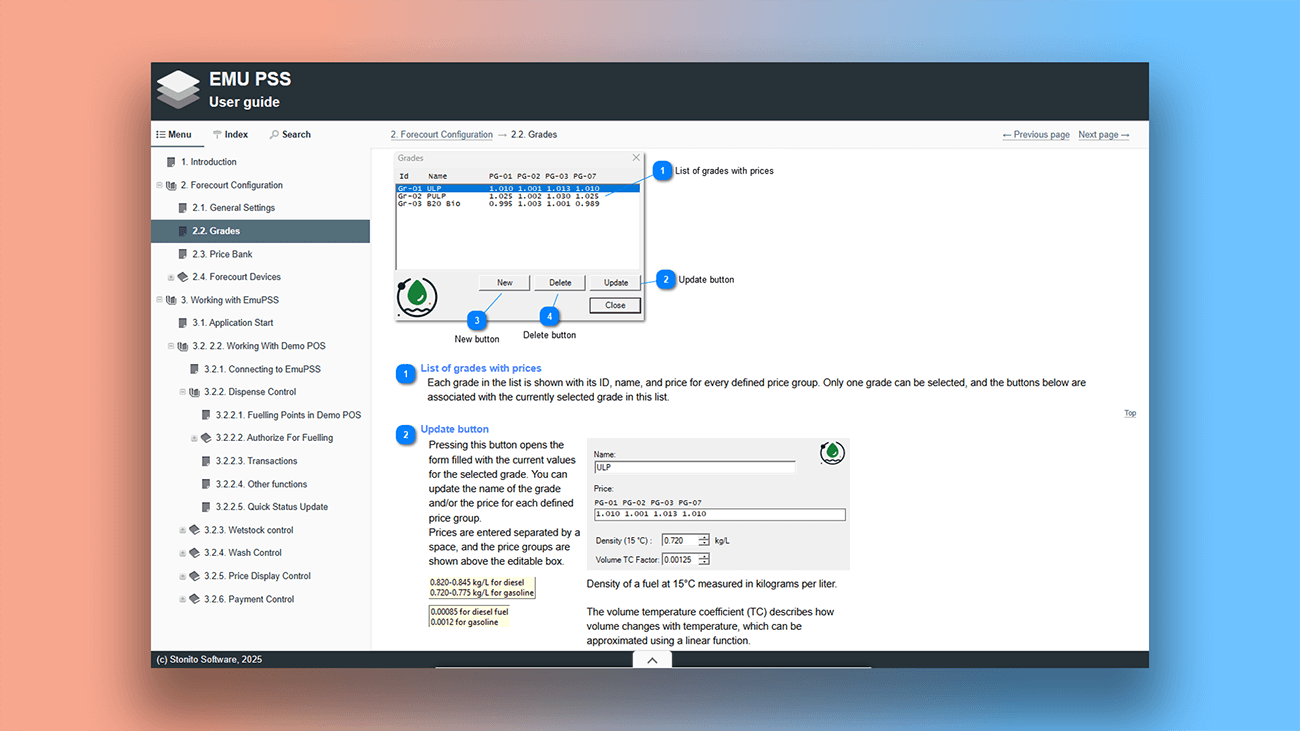
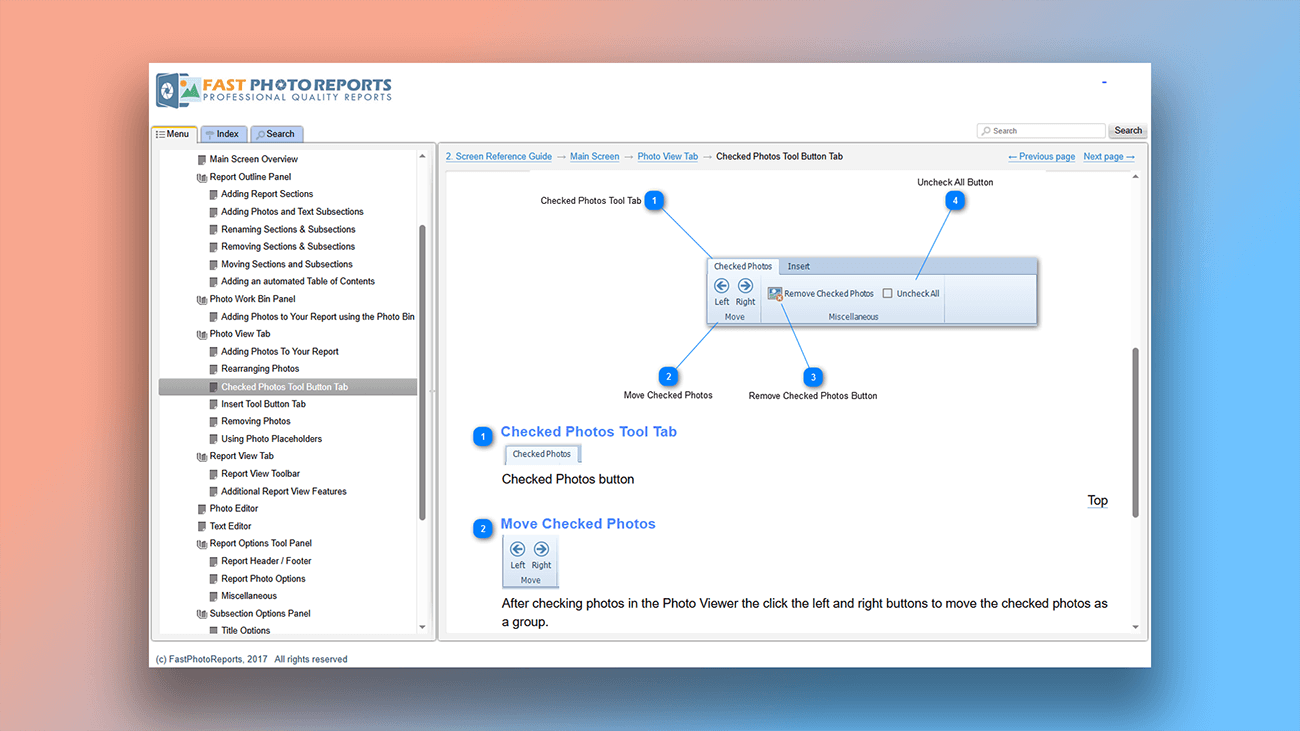
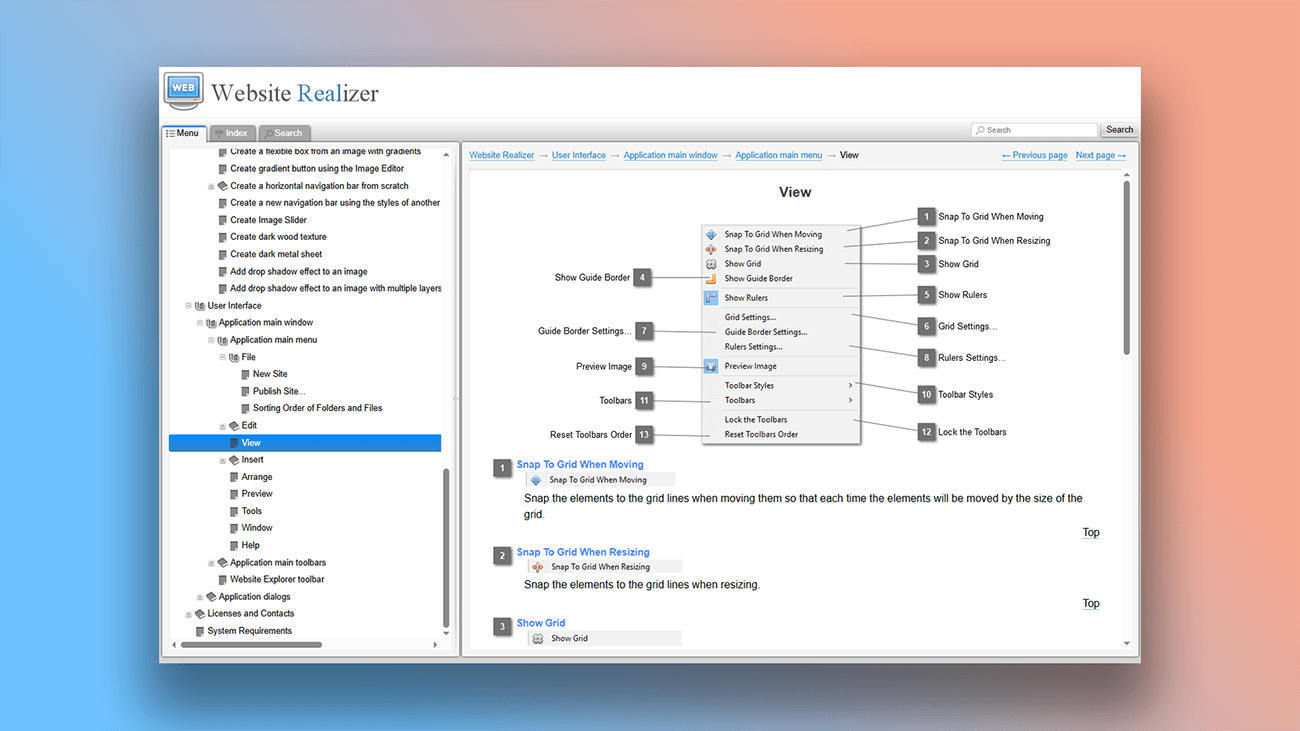
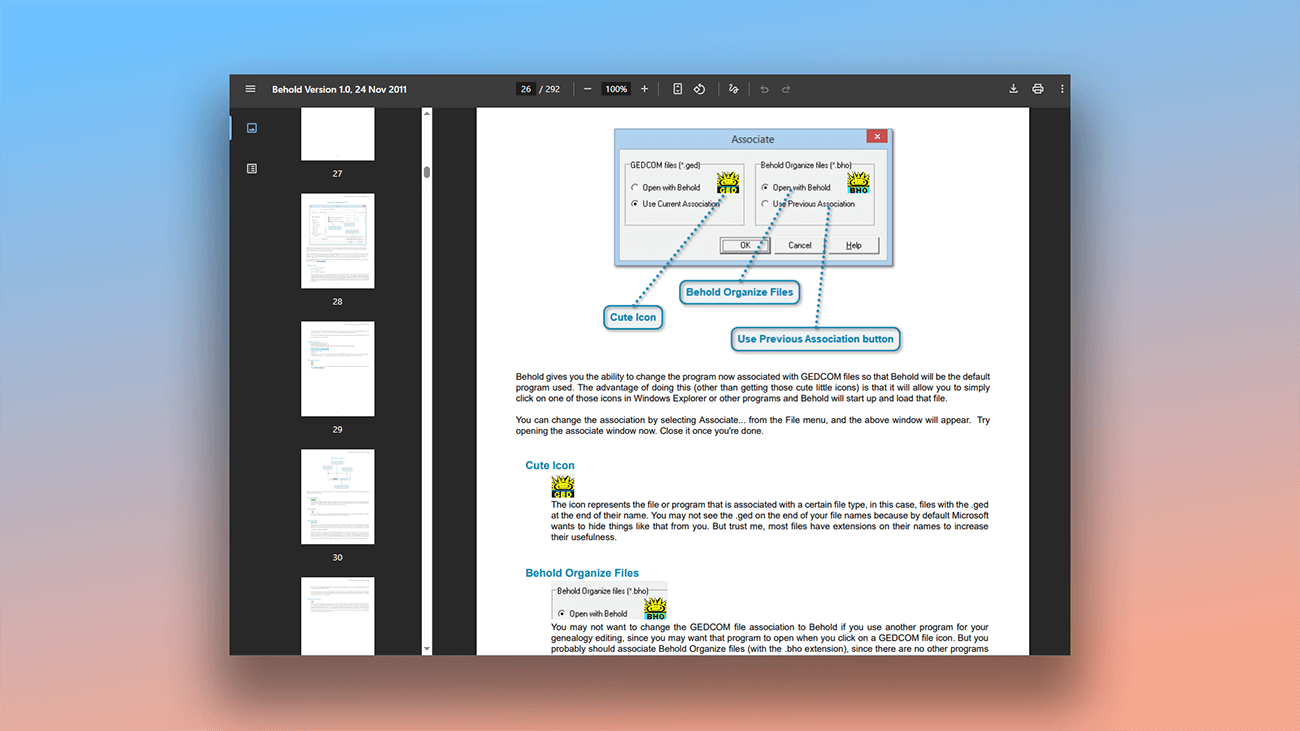
Examples of annotated screenshots created in Dr.Explain
The annotation editor provides a full set of styling tools — vertical and horizontal alignment, font size and color adjustments, and more. Here are examples from actual user documentation created with this help authoring tool.

What are the benefits of using Dr.Explain?
Automation. The automated annotation designer saves you time. Simply open the application window or website — Dr.Explain will capture a screenshot, analyze the interface structure, add annotations to key elements, and include relevant labels automatically.
High performance. Unlike cloud-based (SaaS) solutions, Dr.Explain is desktop software. Its performance relies on your local machine's capabilities, not your internet connection stability.
Custom styling. Flexible formatting options for screenshots and callouts let you create unique documentation designs that match your product's branding.
Creating annotations: manual vs. Dr.Explain
Let's compare the two approaches: writing user docs in a regular program (without a dedicated screenshot annotation tool) versus creating a manual in Dr.Explain with its automatic screenshot annotation.
| Manual approach | With Dr.Explain | |
|---|---|---|
| Screen capture | Requires a separate screenshot tool | Built-in screen capture |
| Highlighting interface elements | Requires an image editor | Automatically highlights interface elements |
| Adding captions to items | The entire process is manual | Generates captions automatically |
| Correction: alignment, scaling, etc. | Time-consuming and difficult to perfect | Easy and precise adjustments with dedicated tools |
What type of users is Dr.Explain suited for?
Dr.Explain is a powerful tool for creating professional documentation. It's the right choice if:
- you want to try a free version before investing in complex software;
- you need to create both print and web versions of your guides;
- your documentation contains lots of images and screenshots;
- you don't want to struggle with customizing the document layout;
- you currently need multiple tools to export to different formats;
- you require full-text search across your documentation;
- you need multiple authors to collaborate on the same project;
- you want multi-level navigation for complex content;
- your help system has grown too large to manage easily.
Users about working with annotations in Dr.Explain

"The first thing that caught my eye when I tried to use Dr.Explain was how easily it handled screenshots. I said “wow!” to myself. You only need to take a screenshot, and Dr.Explain will automatically split it into parts containing different controls. All you need to do, is make annotations".
Mikhail Rusakov, chief executive of OrangeCat Software
Interview with Mikhail

"The capture feature with the ability to extract all our UI's features in clickable zones with links in the help file that you can easily modify via the editor is just awesome. It saves so much time, plus I don't have to use a screen grab utility and Photoshop to edit my screenshots and make visible zones and highlights. It's all automatic with Dr.Explain. I don't even have to start another software".
Clovis Gay, the co-owner and technical director of Hocus Pocus Studio
Interview with Clovis

"Dr.Explain was easy to use and gave me a good way via the screenshots and bulleting to document all my programs’ windows and menu options and output windows simply and straightforwardly. The resulting user manual has the quality and looks professional and gives the user more confidence that the underlying programs must be the same".
Louis Kessler, the owner of Behold Genealogy
Interview with Louis
Frequently Asked Questions
Can I try a free version of Dr.Explain?
Yes, you can download Dr.Explain for free to try before you buy.
Can Dr.Explain capture and annotate only part of a window, not the whole screen?
Yes. You can select a specific area of the screen to capture and annotate. Learn more about annotation designer tool.
Can I export a screenshot to an external graphics editor like Photoshop?
Yes. You can open any screenshot directly in an external editor.
Can I adjust the size and position of annotation frames and callouts?
Yes. You can freely resize, reposition, and customize the style of all annotations and labels.
Does this annotation flexibility apply to all document types, not just HTML or PDF?
Yes. You can customize annotations for all output formats supported by Dr.Explain.